When I started Cloversoft and released the
first versions of PricePoint, there was no such thing as PEX piping
systems. Now it seems it's all that anybody installs anymore so
I decided to create shortcut codes for a few items in the Uponor
PEX line. If you are interested in adding these to your PDS price
list database, it is pretty simple to add them. From the PricePoint
main menu bar choose, Utilities, Bonus Programs then select Import
Shortcut Codes for Uponor PEX. PricePoint will download the codes
from the Cloversoft website and install the codes in your price
database.-Tim Clover
All the PEX codes begin with PX for brass fittings and pipe and
PXP for plastic fittings.
Examples:
PXHC - brass pex 1/2 coupling (brass is assumed)
PXPHC - plastic pex 1/2 coupling
PXHPB - PEX 1/2 pipe Blue (1 ft)
PXHPR - PEX 1/2 pipe Red (1 ft)
PXHPW -PEX 1/2 pipe White (1 ft)
Proposal builder was saving only the first 20 characters of proposal names, found bug in source code of SQLite database and corrected. (thanks to Candace at Brookside Plumbing in Wolfsboro, NH) -Tim Clover
I was talking with Frank Vicari at Ultimate Plumbing in Yonkers, NY when he asked if it is possible to change the name of a supplier in the discounts list because so many small supply houses are being swallowed up by major chains. At the time I had to answer that it wasn't possible but I could see adding that ability wouldn't be too hard so, I got to work. In Supplier Discounts, doubleclicking the supplier name in the supplier list will surface a rename dialog so you can enter a new name for the supplier. Please note: the name that you choose cannot already be used in the supplier list. -Tim Clover
Lately I have heard from a number of customers that they have inadvertently posted a deposit twice. This plays holy hell with the invoice balances and makes a mess of statements for customers. The fix for this has always been a long support call where I walk a customer through using the Data Files app where we delete each and every check and check detail for the duplicate deposit which is tiresome for my customer and frustrating. I decided that my users need a new bonus program (Utilities, Bonus Programs) allowing customers to delete an entire deposit. Due to the risk of fraud or theft by key employees, I decided that the safest way to allow access to this feature is by unlock code. That will require that the user be on the phone with support to receive the unlock code before deleting a deposit to control unauthrorized access. The feature will also create a log file describing the deletions made so there is still a paper trail to be found by investigators should that be necessary.-Tim Clover
Version 5.20.2 - Fix for Proposal Builder. This bug caused extra copies of clauses in the proposal body under certain circumstances causing users to have to delete the duplicate clauses. Also the email function was unable to find the correct email for the customer. - Tim Clover
PricePoint brings us a new level of database reliability in our beloved Proposal Builder application. The first time we start the new version of PricePoint, we may notice a slight pause in the startup process as the old proposal data is converted to the new SQLite format. Also there are a few cosmetic changes in PricePoint's Main Menu such as a modernized icon for Proposal Builder. We concentrated on ensuring that making a proposal be the same as before so we won't need to change any habits to adjust to the new version. We sincerely hope you like the changes! - Tim Clover
Note: Enterprise and TeamWorks folks will need to read the next sections discussing changes that affect them.The Enterprise server should be updated then PricePoint 5.2 can be run on the server so that the proposal files will be converted to the new SQLite format. Next the terminal computers should be updated.
TeamWorks systems should finish up all merge and refresh procedures before updating to PricePoint 5.2. This will ensure that all proposal data in remote computers is merged before conversion.
TeamWorks 5.5 features more modern graphics to reflect the sensibilities of a more modern world. The process of merging and refreshing is largely unchanged although there is now the option to email data packets to the office computer and to refresh remotes via email as well! Read on to find out more about the TeamWorks Office and Remote facelift.
Note: Complete instructions for operating TeamWorks are available within PricePoint Help under Appendix D - TeamWorks.
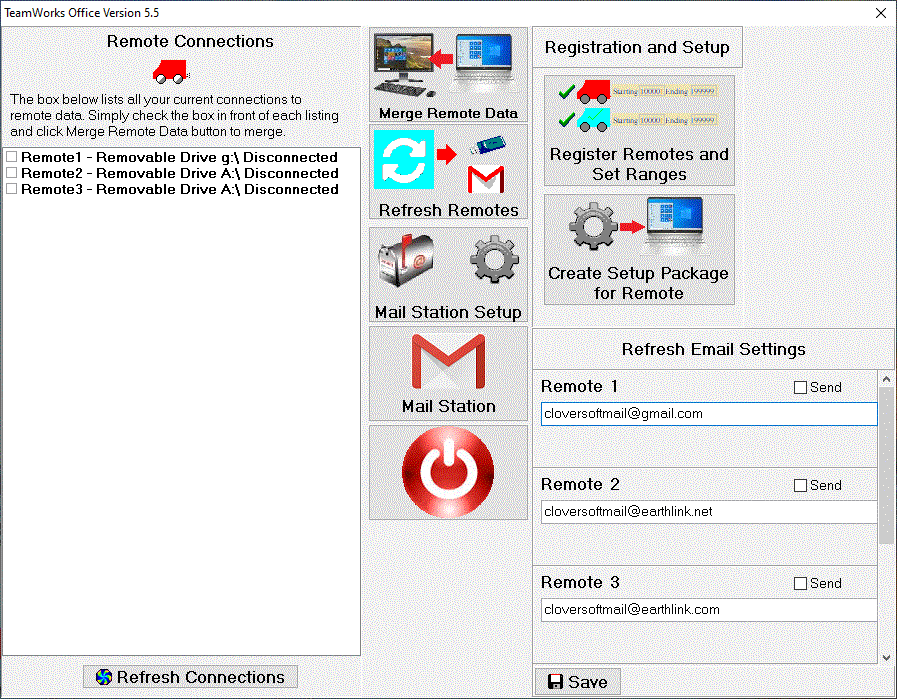
The exit button now looks like a computer power off button and most folks will understand this intuitively. Notice the Setup button has been replaced with direct access to the Register Remotes and Set Ranges button and to the Create Setup Package for Remote button. We judged that computer displays now have so much more real estate that we could eliminate the extra step. We have added the Mail Station Setup and Mail Station access buttons for the new email functionality in TeamWorks 5.5 along with the refresh email setting area at bottom right of the window.
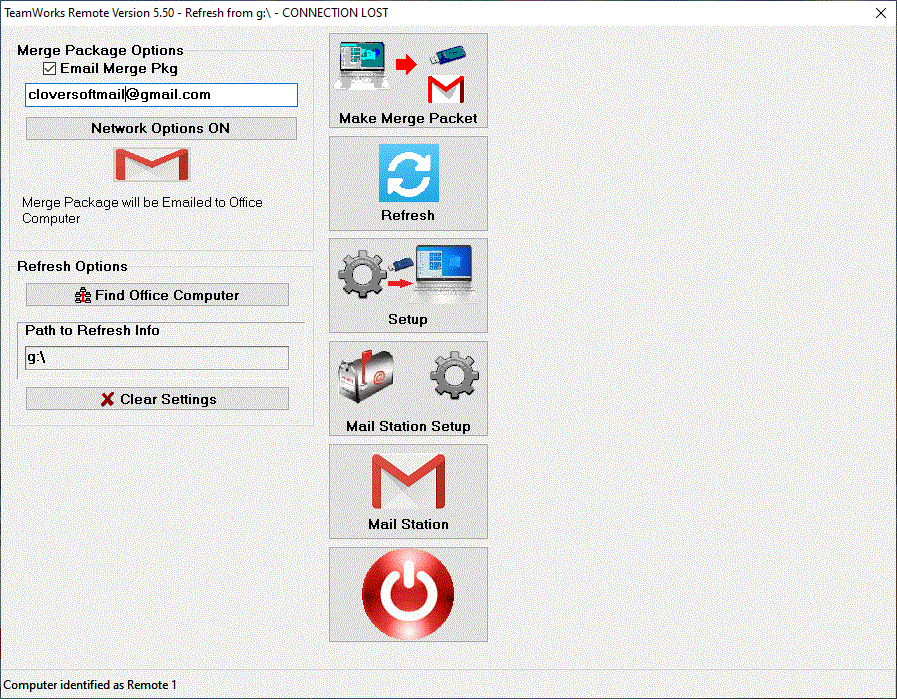
We have added the Mail Station Setup and Mail Station access buttons for the new email functionality in TeamWorks 5.5. Notice that at top right of the window there is a new office computer email address and checkbox to enable merge over email.
Dialing the customer's phone automatically has a long history in PricePoint. This feature requires one of those 56K USB modems you can purchase for about $30. Well, it turns out that one of the Windows 10 security updates ended up disabling this essential feature. I did a little digging and figured out how to fix it. - Tim Clover
Responding to user requests is one of the most gratifying parts of this job. A long time PricePointer asked if it would be possible to attach pictures to the various documents in PricePoint. For instance: users could attach a picture of a jobsite's existing condition to a work order, attach a picture of the finished condition to the resulting invoice. I created a system that allows multiple attachments to Invoices, Estimates, Work Orders, Job Locations, and Proposals. Each attachment can incorporate a picture, a text note that can be used as further instructions for the technician, and the date the attachment was added to the document. An explanation of the new features and how to use them are found below. - Tim Clover
Responding to a long time PricePointer's wish list, we have added the Create Report button to the Accounts Receivable report. We made the change to prevent the report running as soon as the window is opened, which can eat up a lot of valuable time, especially if you need to make changes to some of the settings before the report is run. Now make any changes to the effective date, filters and checkboxes before clicking Create Report to run it.

Attachments can be added easily to most any
document in PricePoint.
Simply find the Attachments button when creating or editing any
invoice, proposal, estimate or work order.
Click the Attachments button to start. ![]()
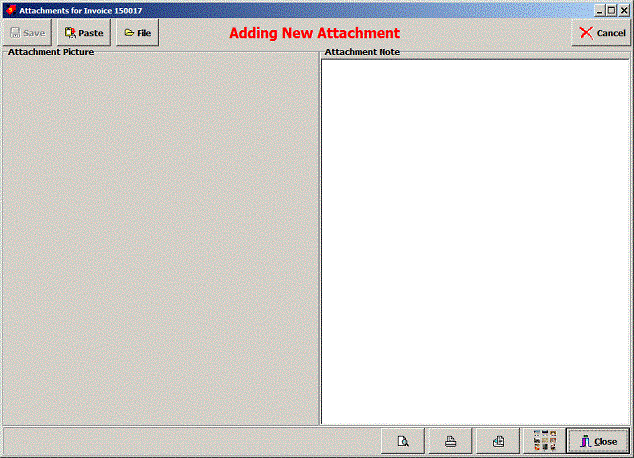
The first step in creating attachments is to use the Paste and
File buttons to attach a picture to the document.
First copy the picture from your email, or email the picture to your computer, then selecting the picture and right clicking Copy. Once the picture is copied to the windows clipboard, click on the Paste button to add it to your attachment.
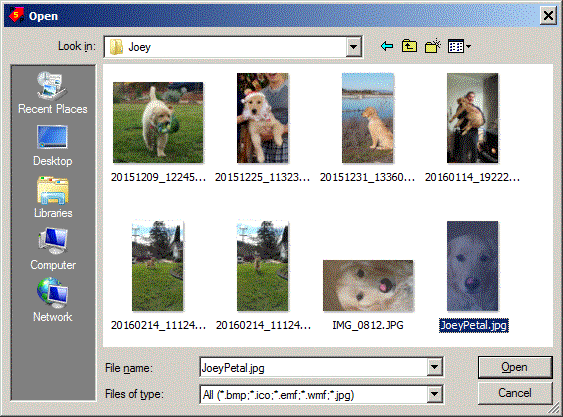
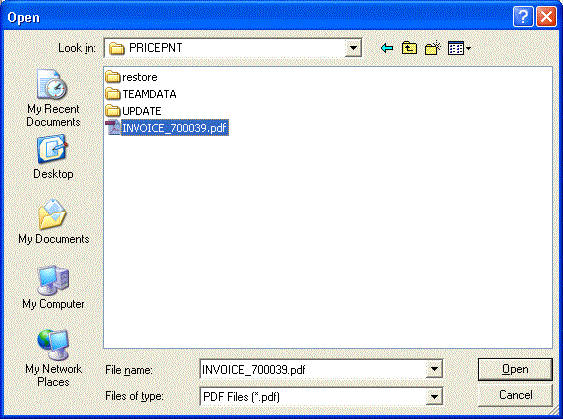
Click File to show a windows explorer dialog
that allows users to navigate to a folder containing pictures
and select it and click Open.
Once you have pasted a picture or selected a file, the picture
will show in the left side of the dialog.
Type anything you’d like into the note field to add some additional information to the picture. Of course, it is not mandatory that a picture be added. Adding just a note attachment is permitted.
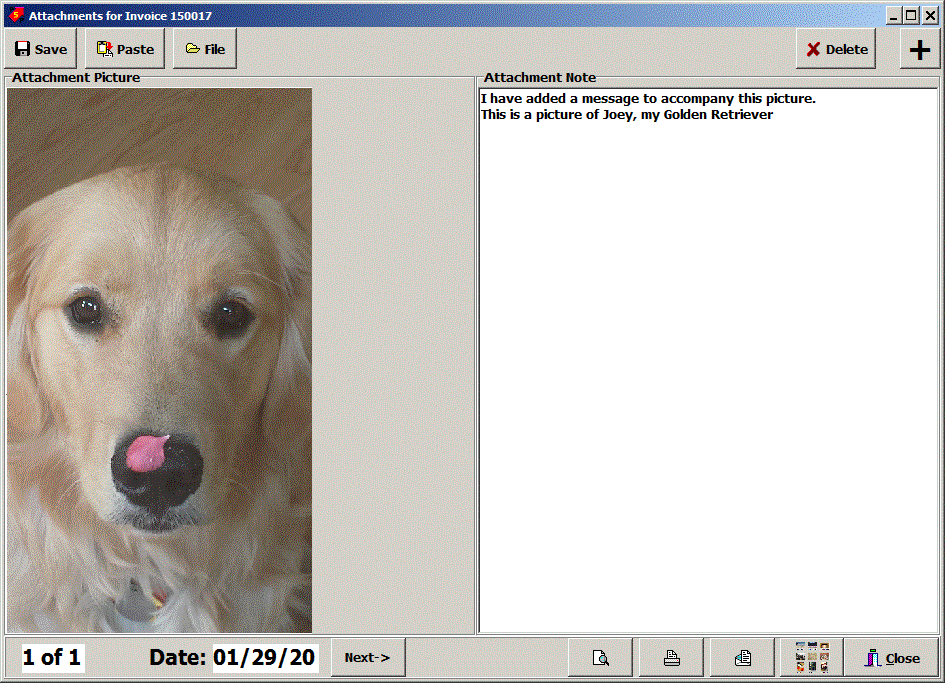
Click the Save button to save the attachment.
What if you have several pictures attached
to this document? PricePoint can display all of the pictures attached
to this document by clicking the Index button. ![]()
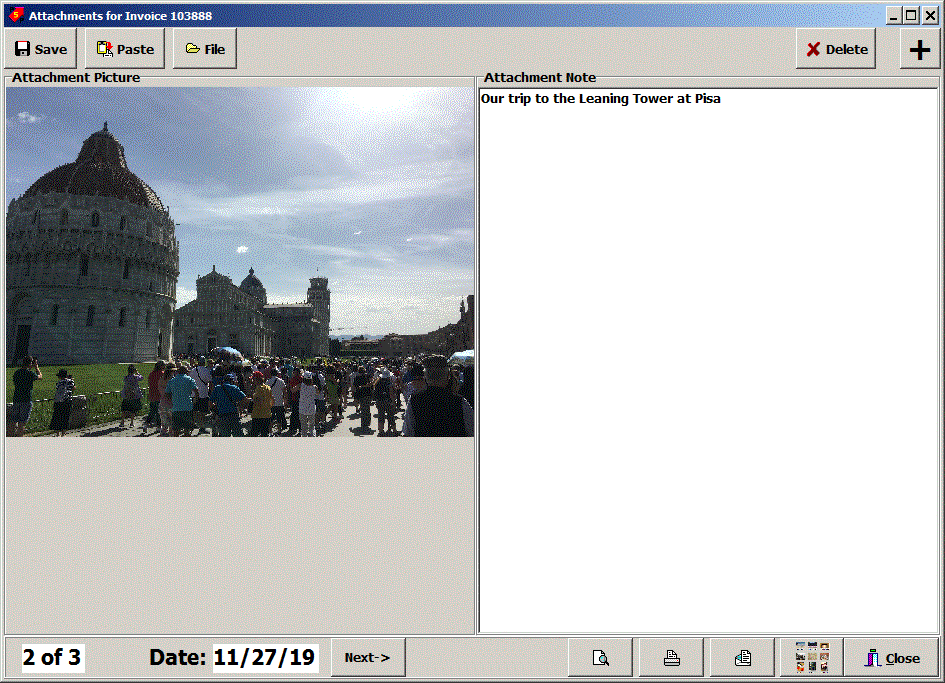
Simply click on any of the buttons in the index display to display
the attachment full size. Notice that Note only attachments are
also displayed on the attachment index along with the date the
attachment was saved.
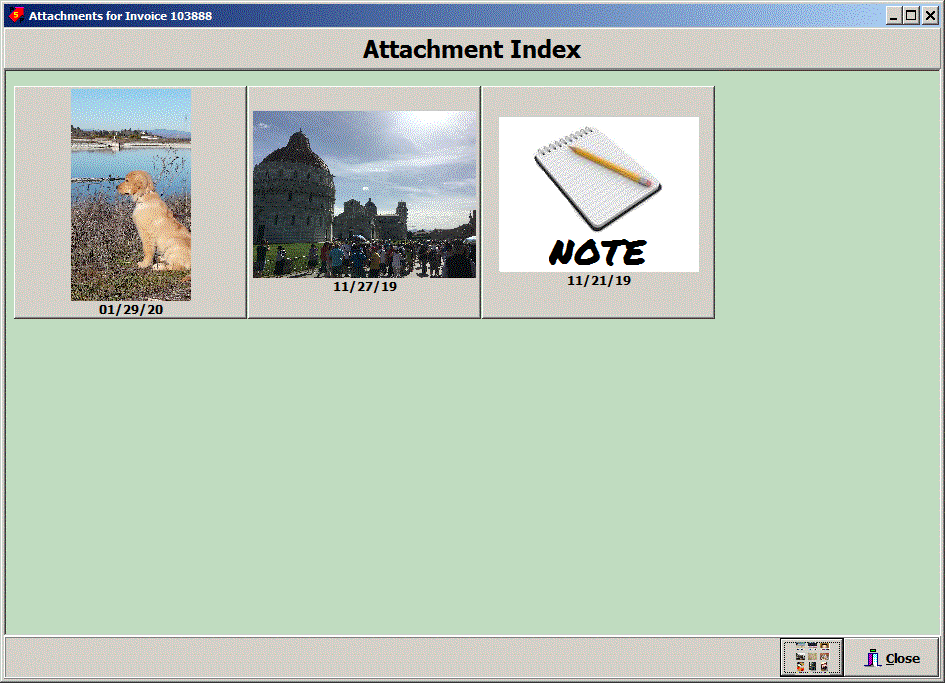
For this illustration, let us click on the middle button.
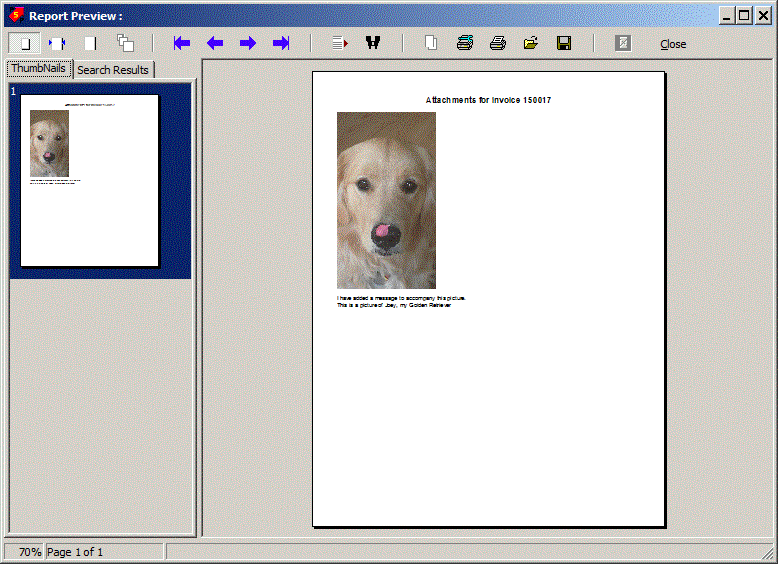
Click the Print preview button and PricePoint
will display the preview of the printout.
Click the Print button to print the attachment.
Click on the Email button to show the Email
to Who dialog.
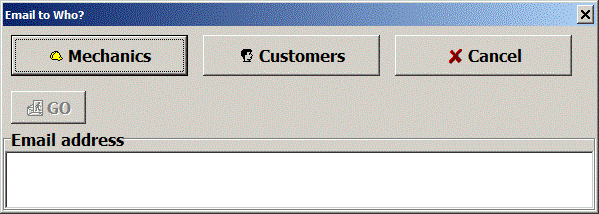
Clicking Customers will open the Find Customer dialog with the
customer linked to this document already selected.
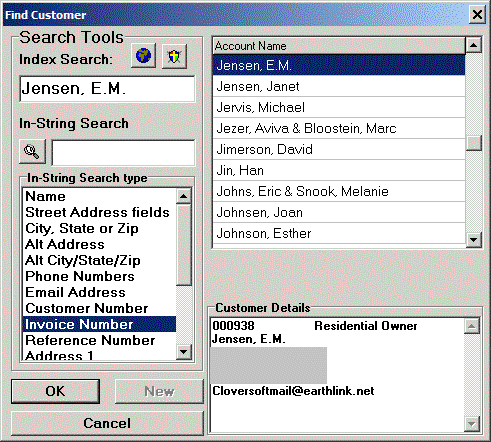
Select the customer by pressing enter or clicking the OK button
and the email address will be filled in.
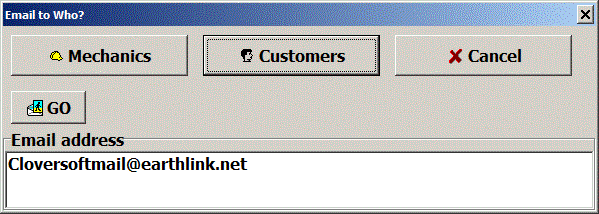
Click Go to start the sending process. PricePoint will attach
a .pdf file of the attachment printout to the message. The subject
is filled in with “Picture attached to this message”.
Of course, add any additional text to the body of the message.
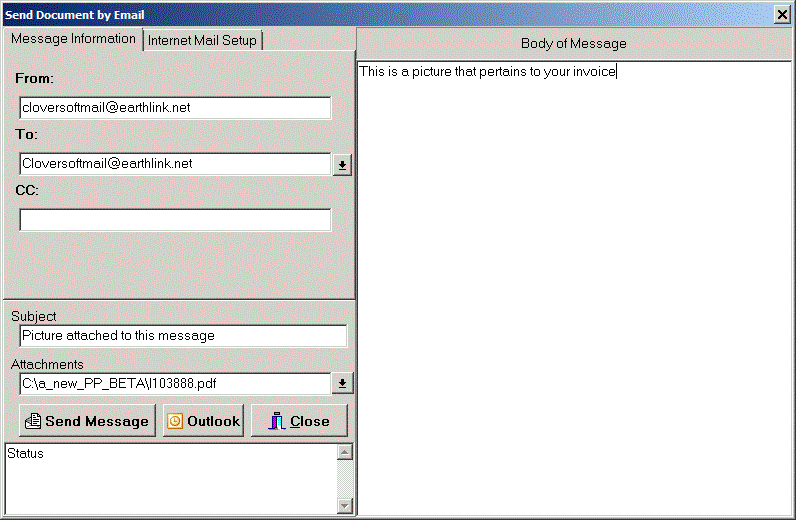
Click Send Message to send it to your recipient.
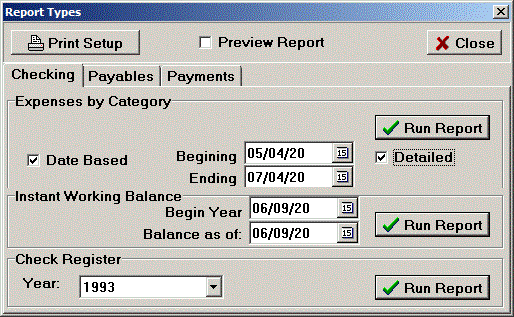
This program update is intended to help out those of us who took out a Payroll Protection Program loan from the Small Business Administration. You see, in order to apply for loan forgiveness, borrowers have to document how the loan money was spent. Originally, 75% of the loan was required to be spent on Payroll with the rest spent on rent and other qualifying expenses, all within a 2 1/2 month period, in order to have the loan forgiven by the SBA. That being said, an expense report period is required to start on the date that the loan was funded and end after the period prescribed by the SBA. This period during which the money must be spent has changed from 1 1/2 months to 24 months and may change again. In short, we needed to add starting and ending date edits and a new detailed expense report to document the use of the loan money.
From the Main Menu click on Checks button, then click on Reports button on buttonbar of Checking + Payables app.
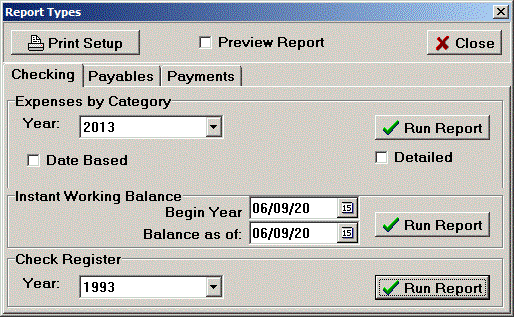
To run the report for the specific range required by the SBA click the Date Based checkbox to show the Beginning and Ending date edits as shown below.
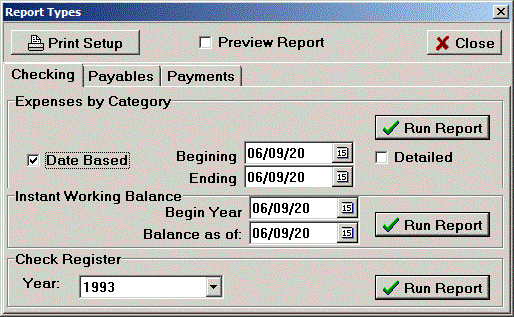
Change the beginning date to the date the loan was funded and the ending date to the end of the period that you are allowed. Then check the Detailed checkbox for a detailed report.
How often have you been asked by a customer to give his an estimate for a job that is identical to a time and materials job that you completeed for another customer? Like, every other day, right! Let's try it out!
1) Click the large Estimates and Proposals button on the Main Menu.
2) Click the New Estimate from Invoice button (lower right).
3) Find the customer and select to view all
the invoices on file.
You can even search by invoice number if you know what that
is.
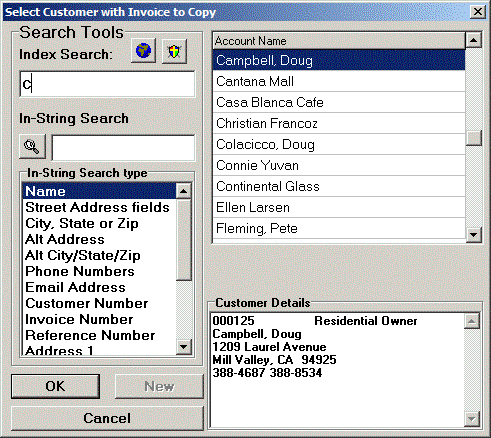
4) Click OK to display all the invoices on file for this customer. Selecting an invoice number in the list at left will show the invoice job description and breakdown. The tabs next to the summary tab will reveal all the details in the bill of materials, labor and extra charges sections of each invoice. Incidentally, if you knew the invoice number and used invoice number search to find it, that invoice should be selected in list when the dialog opens! When you find the invoice you want to copy, click Copy this Invoice.
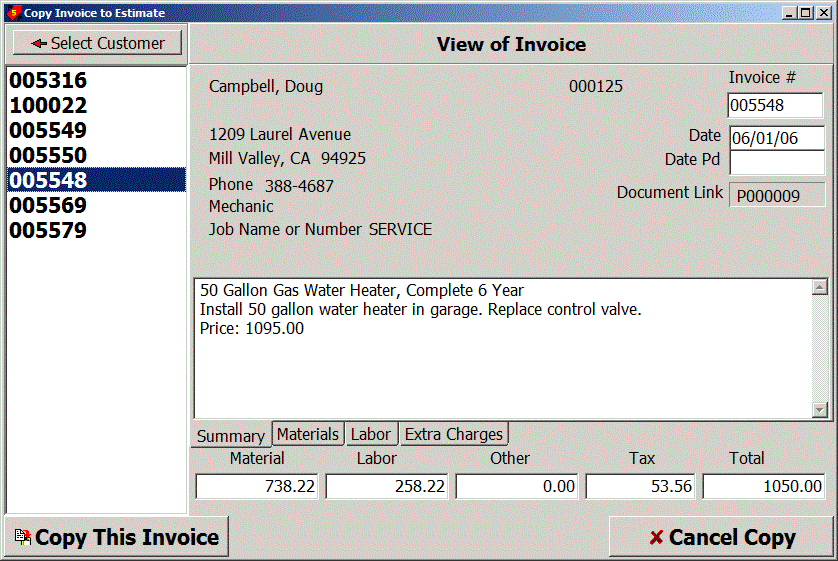
NOTE: If it turns out
that this customer does not have the right invoice you want to
copy, click the Select Customer button to go back to pick
a new customer and view their list of invoices.
5) Find a customer for your
estimate opens to allow you to pick a customer to use for
the new estimate or you can create a new customer by clicking
the New button.
6) Click Next to continue
7) Most likely you will want to select Update Prices and add materials to estimate from the choose options box.
8) Probably you will want to Reprice @ Saved Settings so that prices will be updated by any price changes that have occured since the original invoice was made.
9) When you've finished making any necessary chabnges to the bill of materials, click Next and make any necessary changes to the labor hours.
10) Change your sales tax rate, method or add any extra charges and click Next.
11) Click Finished.
12) Review the data on the screen and click Next.
13) Click Save and Print.
14) Make your selections in the Print Options dialog and click Print.
Many thanks go to longtime PricePointer Bob Genrich of Genrich Plumbing in Wisconsin. - Tim Clover
It has been 3 years since Cloversoft started charging $690 per year for an annual subscription and it pains me to have to raise prices but it is time for us to face reality. The new subscription price will be $720.00 for an annual subscription, $410.00 semi-annual and $220.00 for quarterly. The increase represents only about 5% so I think this should be manageable for our users. That increase will flow through for users of Enterprise and TeamWorks as well, increasing annual to $365 and quarterly to $115.00.
I figured that a lot of folks in our users group didn't know that they can read our newsletter from the Help menu in PricePoint as in: Help, Browse the Newsletter. In the spirit of "a picture is worth a thousand words" I thought it would be a good idea if I added a button on the Main Functions Menu so people can take advantage of the feature.-Tim Clover
If you read last months newsletter, you may remember the issue regarding batch printing invoices and email: it didn't work. I formulated a plan of attack and can now announce that the new version has that problem solved. When you're batch emailing invoices, PricePoint won't email all the checked invoices in the list, only the one invoice selected in the batch print list. I wanted to make sure that you could click the preview button to view the invoice before you sent it off to the customer. You might want to enable/disable the bill of materials and other details before sending the email. At least, you'll have a fighting chance of sending the right information with this setup. - Tim Clover.
Acorn was removed from the price database in September of 2017 when they were dropped by Trade Service. They are back with Hosebibbs and Hose and Supply boxes.
If you are one of the many folks who use Apollo ball valves, you've been used to starting a menu search with the letter "C" for Conbraco. Please now find your parts by entering "A" as the manufacturer has been renamed Apollo Valve. Thanks for your attention and we apologize if this change causes some confusion. - Tim Clover
Outlook support improved: PricePoint now works with Outlook 2017.
Update Waiting Alert: PricePoint now alerts you when an update is waiting for you. The new Updates button will be visible on the buttonbar of the Main Functions Menu when your copy of PricePoint needs to be updated. If you load your subscription CD or check for updates every month, the Update button should become visible on or after the 10th of the month. Just click the button when it appears and follow the instructions to update your software and database. MAKE SURE YOUR ANTIVIRUS IF OFF OR YOU ARE USING TREND AV.
For those of you who prefer a proposal that
is short and to the point, now there is a new Print Job Location
checkbox on the heading tab right under the Print
Heading checkbox. If your proposal has a complete job location
address, that address prints out below the two regular customer
info boxes on the form and pushes the rest of the proposal down
making the printout somewhat longer. The default for printing
the job location is on so that PricePoint will continue
to behave as it always has, as thoughtful software design dictates.
But if you uncheck it, the software will just print the customer
address boxes and leave off the Job Location box to save paper
and about 3 inches on your printout. I hope that the space savers
will find this enhancement useful. Thanks go to Sue Rieve at
Rieve Plumbing in Bethel CT for bending my ear and getting me
off my butt! - Tim Clover.
You know those customer phone number labels you can change in the customer information screen? Originally, those labels were just for your edification in your office as the print outs always would show Customer Phone for the Main, Fax for phone 2 and Cell for phone 3. The customer phone labels you have entered will now print out on invoices, estimates, and work orders.
Did you ever try putting a Customer Balance Report in a window envelope to snail mail it? Well, it doesn't fit and you have to spend time folding it twice. This PricePoint update is determined to fix that problem. The old report, created so many years ago, was designed to make maximum use of the space on the page - at least that's how I remember it. Now there's a new checkbox Fit Window Envelope to make the customer address stuff fit in the window of a standard single window envelope. The report wastes a few lines by increasing the top margin by 2/10 inch. Thanks go to Karl Lewis at Alert Plumbing in Arcadia, FL for bringing it to my attention - Tim Clover
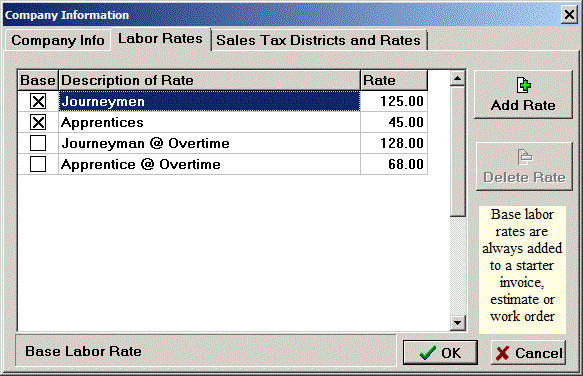
A customer recently asked me if there was a way that every time you start a new invoice, estimate or work order, all the labor rates could be automatically added to the labor tab. He asked because his office manager was complaining that she had to always click the drop down and add the rates every time. I did a little checking to see how difficult this might be and how it would affect other users that have been used to the original method: previously, only the first two default rates would be added. So: introducing Base Labor Rates.
Base labor rates are the rates that will always be added to a new invoice, estimate or work order. To change which labor rates will be added go to the menu bar at the top of the Main Functions Menu and choose Setup, Company Information and click the Labor Rates tab. There's a new the Base rates column where you can set your base rates by checking the boxes at left. Notice that the first two rates are Base rates, so if you like the way it has worked up to now, you don't need to do anything and it won't change. Thanks to Joe Watson, Watson Plumbing & Heating, Kennett Square PA for his suggestion - Tim Clover.
From the Main Functions Menu choose Help, Check for Updates. The beauty of our new update procedure is that you'll never have to log on to a website and remember your login password to get your update! If you are a subscriber in good standing, when you check for updates, PricePoint knows who you are, looks up your account and allows you to download your update.
Just a few words of warning: First. if you have a slow internet connection you will wait a long time for 120MB of data, that said, my connection (cable modem) downloads my update in about 30 seconds and it's not a super fast connection. Second, You will very probably have to disable your anti-virus software for the duration of the update process. See, the AV software thinks the behavior of PricePoint's Web Update makes it a virus. For example, my AV software (Trend Antivirus) gave me a message that it was blocking PPWebInstall.exe and then deleted the software from the system so I couldn't run the update. So really, disable your AV software and get ready for one of those Windows system messages that a program wants to make changes to your system and should it be allowed (Click Allow). - Tim Clover
God hates a coward. You've heard that expression, right? Well, here goes.
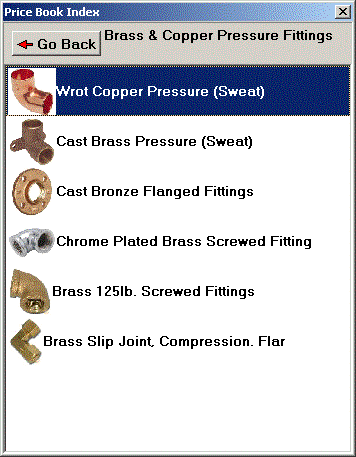
Let's talk about our PricePoint price book. If you need to look something up that you don't know the shortcut code for, you've gotta use the price book index. So with pricing going you click on "Price Book" and you get the indexes that used to float around as little separate modal windows, and modal windows require that you click a button or dismiss them before you can go on. OK, new improvement. The Pricebook window now has a panel on the left side where the indexes live, no more floating and no more modal aspect to the index.
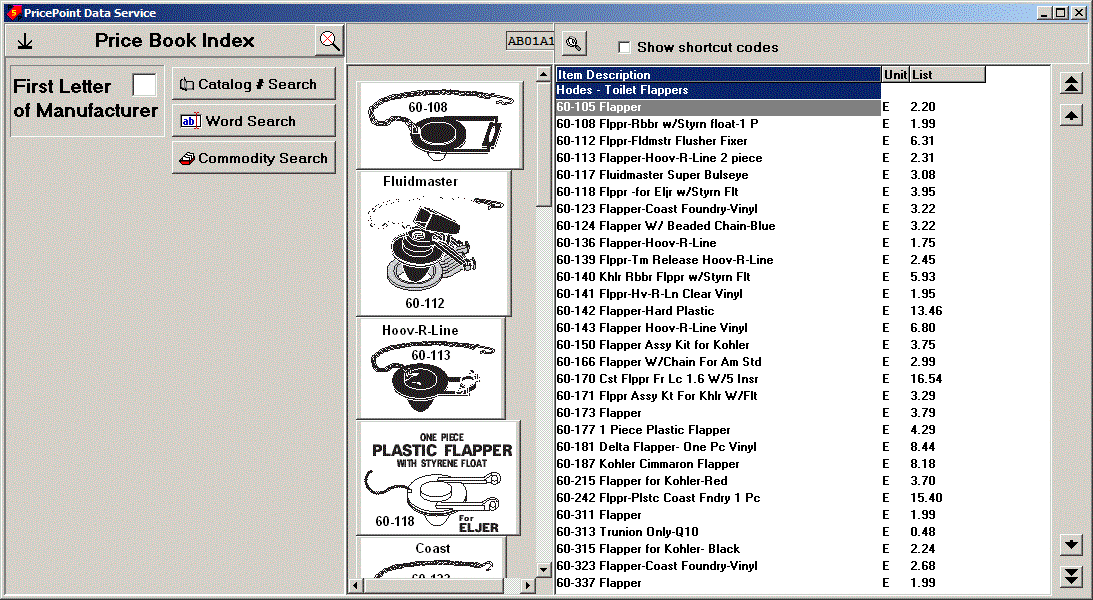
As you can see, the pricebook opens right away and shows the index on the index panel. It shows the Hodes closet flappers because that is what comes first in our database. As before the change the cursor is flashing in the first letter of manufacturer box. To demonstrate, lets type the letter "c" to show the manufacturers in the database that start with that letter.
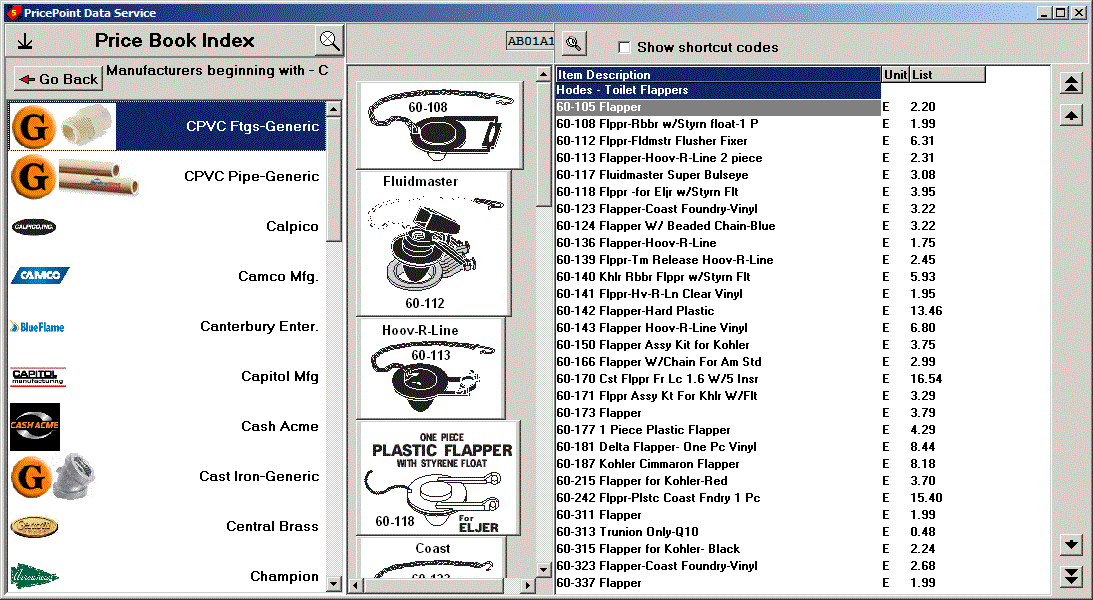
It's getting cooler! The indexes show manufacturer logos alongside the names! Here's a little detail to keep in mind: notice that the generic manufacturers are identified with the orange G badge. This means those manufacturers include lots of different manufacturer's products within their lines to simplify the workings of PricePoint. You can still use the arrow and pageup pagedown keys on the keyboard to move the selected manufacturer in the index up or down and select that manufacturer by using the enter key on your keyboard. Every effort has been made to make the keyboard experience unchanged with this new improvement. Obviously you can also use the mouse! To demonstrate let's scroll down to Copper Drain ftgs and then <enter> and then <enter> on Copper & Brass DWV Fittings.
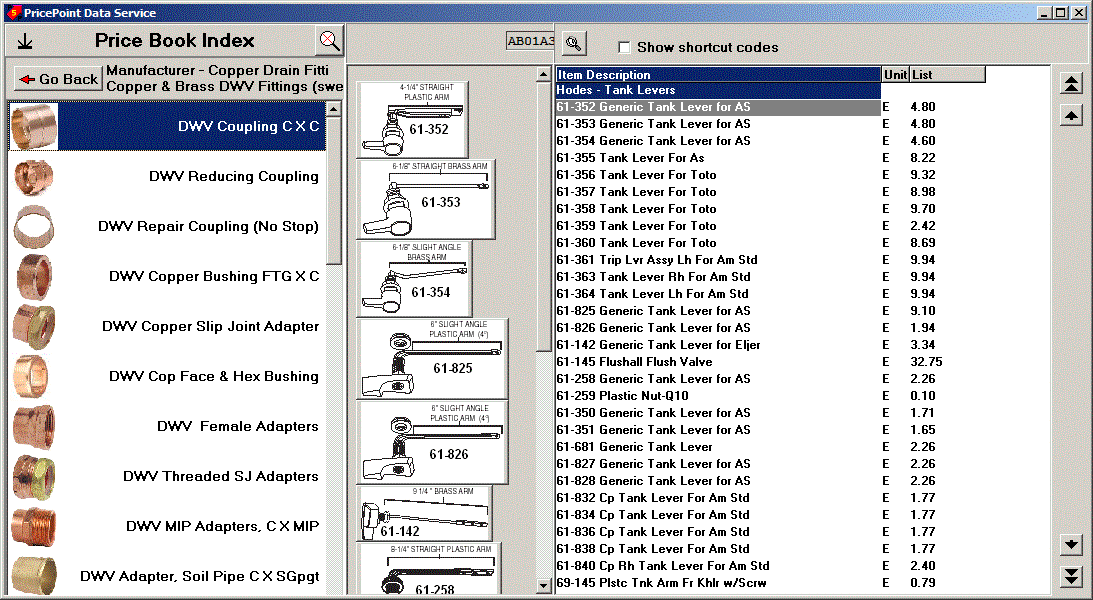
Lots of pictures and neat right justified descriptions in the Index! Select DWV Copper Slip Joint adapter and the focus turns to the PriceBook window. You'll notice that the up and down arrows drive the selection bar, enter will add the item to your bill of materials in the main Pricing window. Here's something new: if you want to go to another heading in the database using the keyboard, use the left arrow key on the keyboard to return focus to the index selector.
Hitting the <ESC> key will always go
back a level in the index or you can click the Go Back button.
If you need to cancel the search by manufacturer name and start
over, click ![]() the cancel
search button. The stick to bottom button
the cancel
search button. The stick to bottom button![]() resizes
the price book window to fill the entire width of the desktop,
if you click it you'll see it now has a different picture on it
showing that a click will float the window in the center of your
desktop at default size.
resizes
the price book window to fill the entire width of the desktop,
if you click it you'll see it now has a different picture on it
showing that a click will float the window in the center of your
desktop at default size.
Cancel the search and click Commodity Search. See how the Commodity search button menu shows in the index panel as you would expect. Click and see the subcommodities with pictures, as before, but all staying in the index panel.
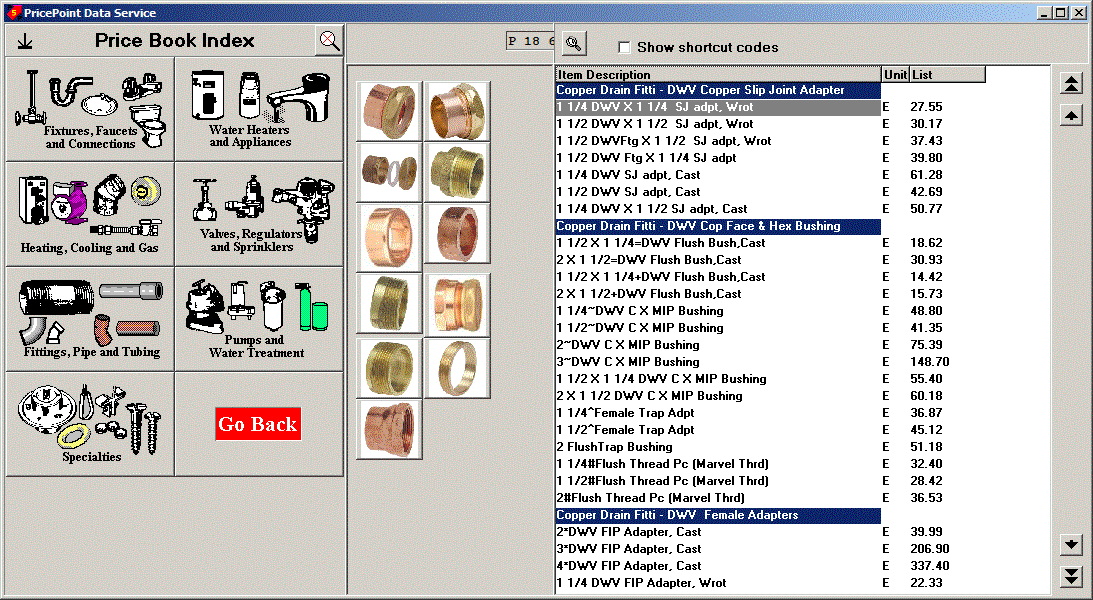
The pictures in the index, as the pictures elsewhere in the database, are a work in progress. Some of the Generic manufacturer icons just have an orange G badge and haven't been expanded with additional picture information. This will be improved soon because I feel that it is so much easier to pick through these menus when there are clear pictures to help guide you! I hope you like what I have done and that it makes your experience more pleasant and productive. - Tim Clover
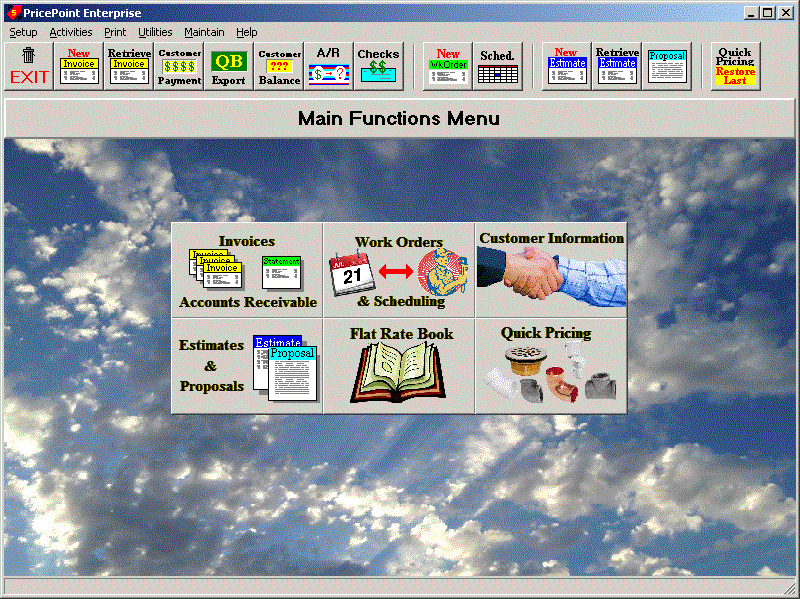
PricePoint 5 is more EVOLUTIONARY than REVOLUTIONARY, something most users will find comforting! Everything is still where you're used to finding it but the look of the Main Menu has been freshened up a tad.
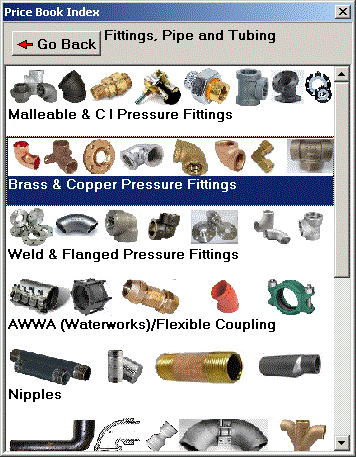
Pricing is unchanged except for the addition of nifty picture indexes. It's always easier to find a picture in a list than text, for me, anyway. Picture indexes will help you find and price out the parts you need faster!
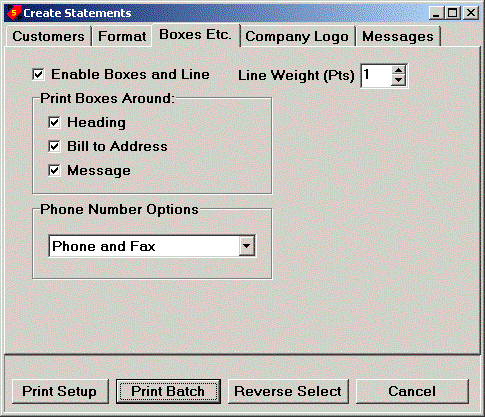
Phone number print options - Choice of printing Phone, Fax, or Cell on a customer statement.
Add additional recipients to an email message.

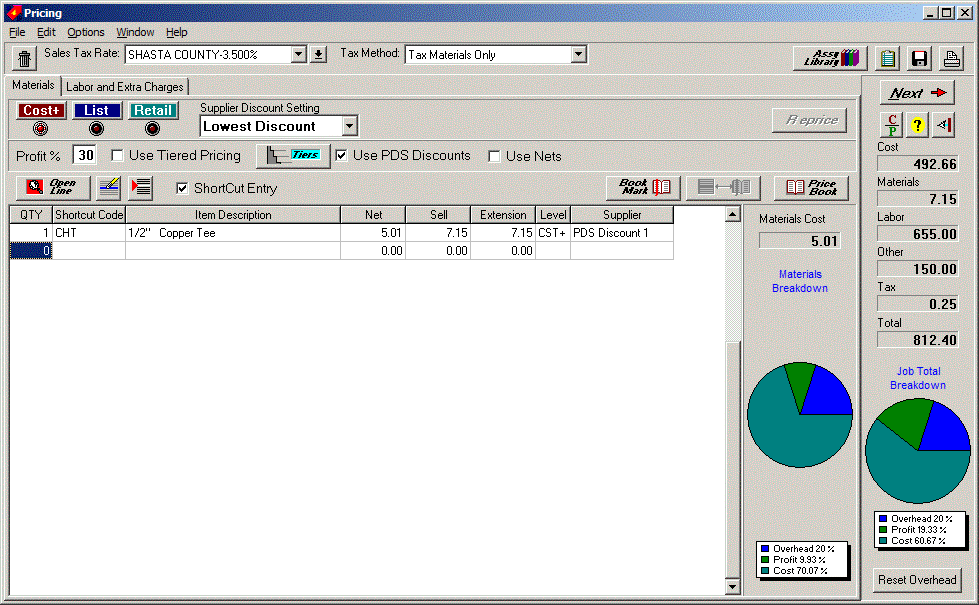
The newest version of PricePoint shows a profit picture on materials, labor and the entire job because you can now enter the cost of labor and extra charges. Also, you can enter the houly wage in the mechanic list and tie the hourly cost of a mechanic to the sell price of his labor. Take a look at the Pricing screen below. Notice that there is a materials cost pie chart showing the materials profit picture and a separate one at the extreme right showing the breakdown for the entire job.
There is also a pie chart for Labor Breakdown on the Labor and Extra Charges tab, see below
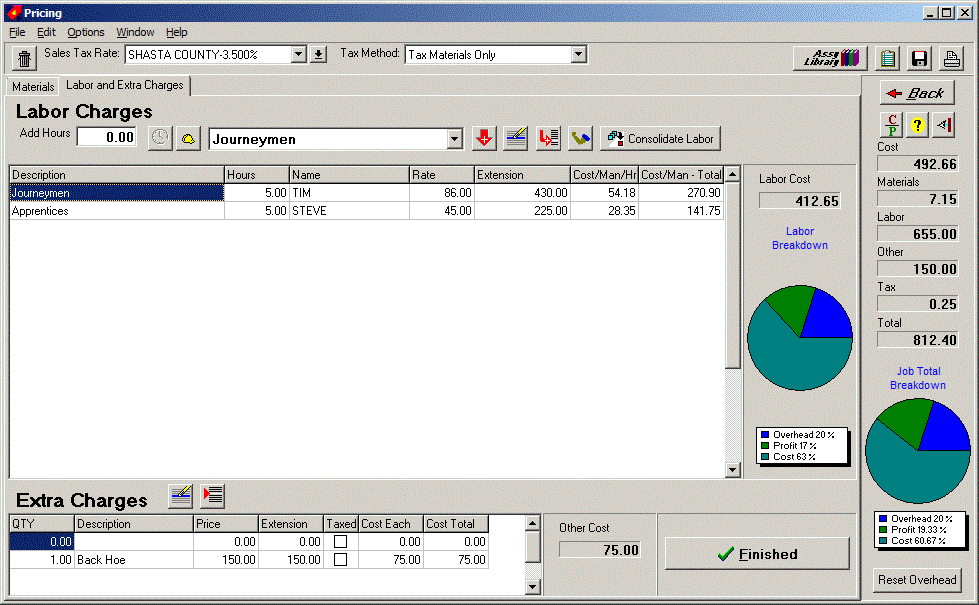
You'll also be able to enter your cost of Extra Charges.
Click in the Cost Each column and PricePoint will multiply times the QTY to fill in the Cost Total. If your cost is a lump sum not tied to the QTY multiple, just click into the Cost Total column.
Click in the Cost/Man/Hr column and PricePoint will multiply times the Hours to fill in the Cost/Man Total. If your cost is a lump sum not tied to the Hours charged, just click into the Cost/Man Total column and enter it directly.
Click the "Hardhat" button in the Labor area to bring up the Mechanic List. You'll need to enter the hourly wage paid to the mechanic first. Notice the Labor Cost Options box: There is a checkbox to Add labor burden to the hourly wage of the mechanic when posting costs of labor. Checking the box will apply the labor burden percentage shown in the dropdown box, defaulting to 25%, which you can change if desired.
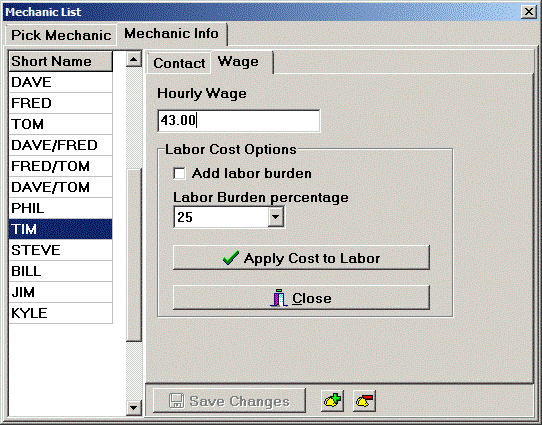
When you've got the hourly wage set up for the mechanic, click apply cost to labor. That's it.
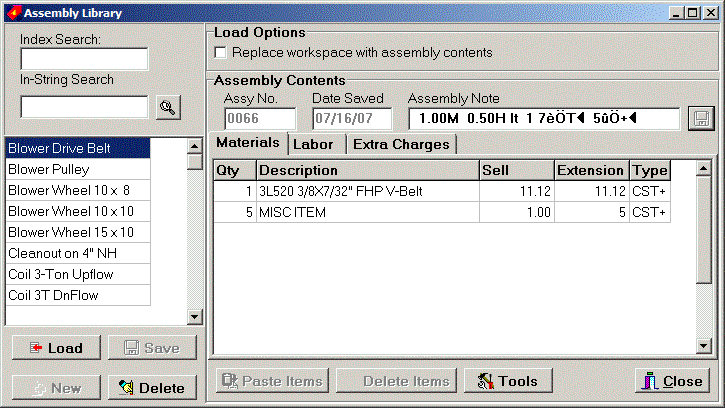
Assembly library now has the date that the assembly was last saved as well as an accessible Assembly Note field. This field was used by old versions of pricepoint but is now obsolete so you'll see some nonsense already filling that field, Just type over the nonsense and click the save button at the right of the field.
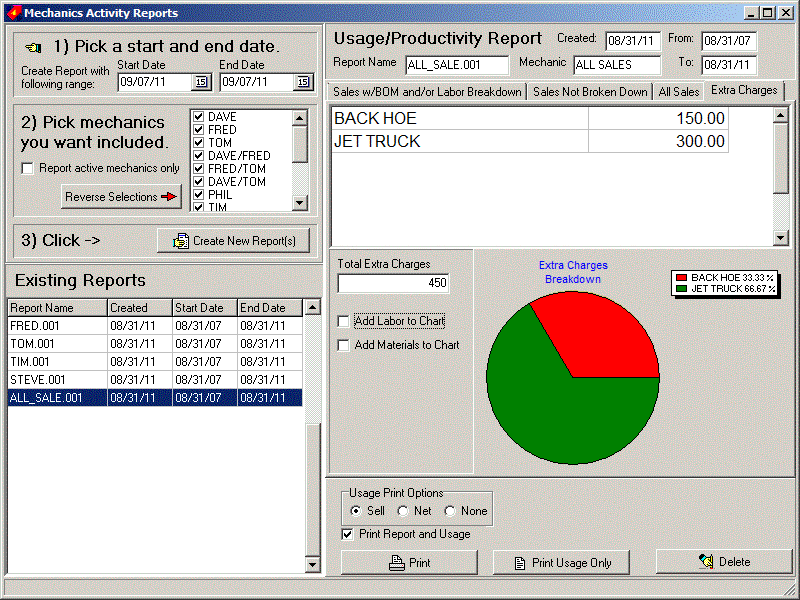
The report has been changed to reflect the costs of labor and costs of extra charges. I've redesigned the report screen by adding tabs for all the old sections as well as a new tab for the Extra charges breakdown showing it's own pie chart
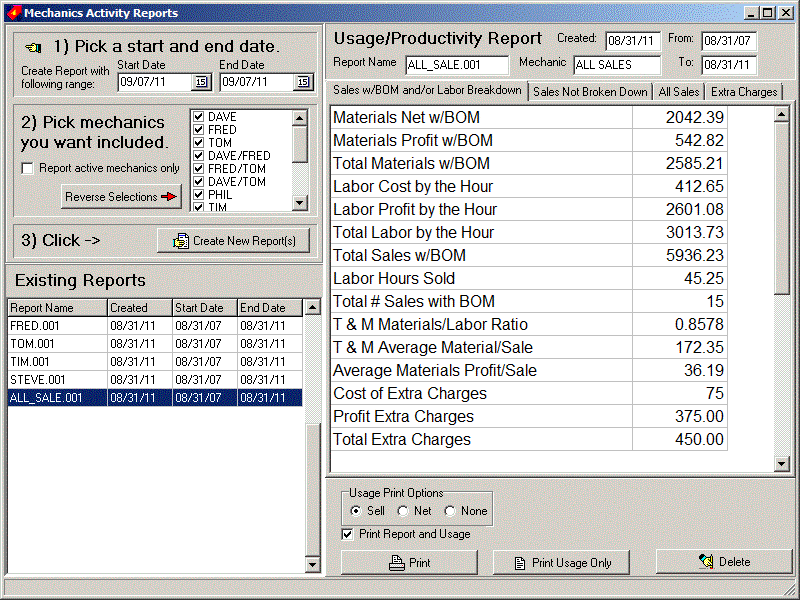
Notice that the pie chart area has checkboxes to add labor and materials totals so you can see the percentage of each extra charge against the totals
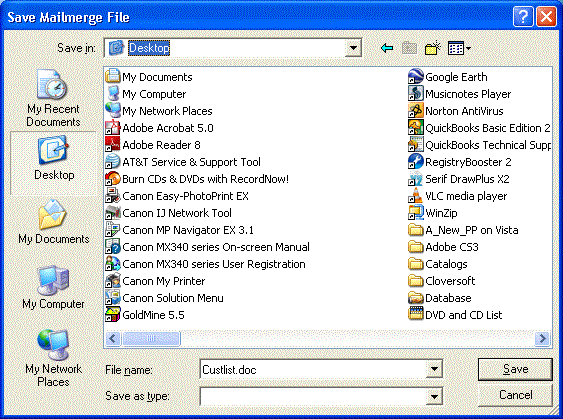
Creating a mail merge file will result in a Save To dialog added so users can save the Mail Merge file to desktop or whatever. We found a lot of users were having trouble locating the files in the pricepnt folder.
We added a fix Inventory button to remove duplicate items by item description.
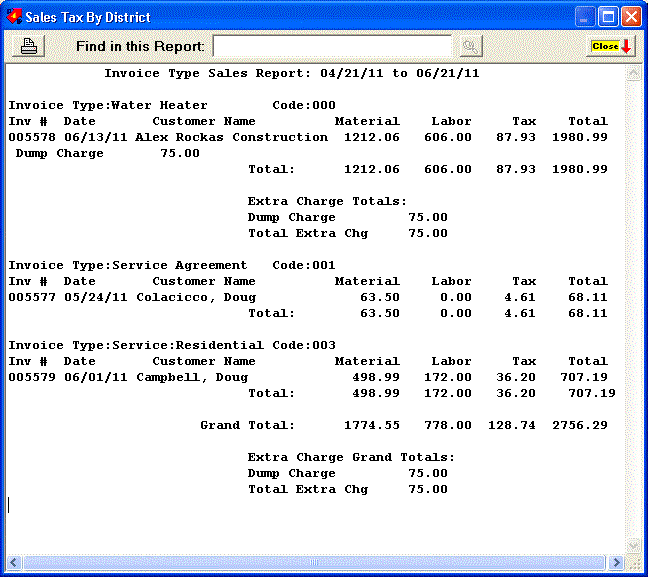
Invoice Types: Create invoice types (water heater, heating service, service agreement, whatever!) and PricePoint will report on those invoice types by time period. Create up to 1000 invoice types.
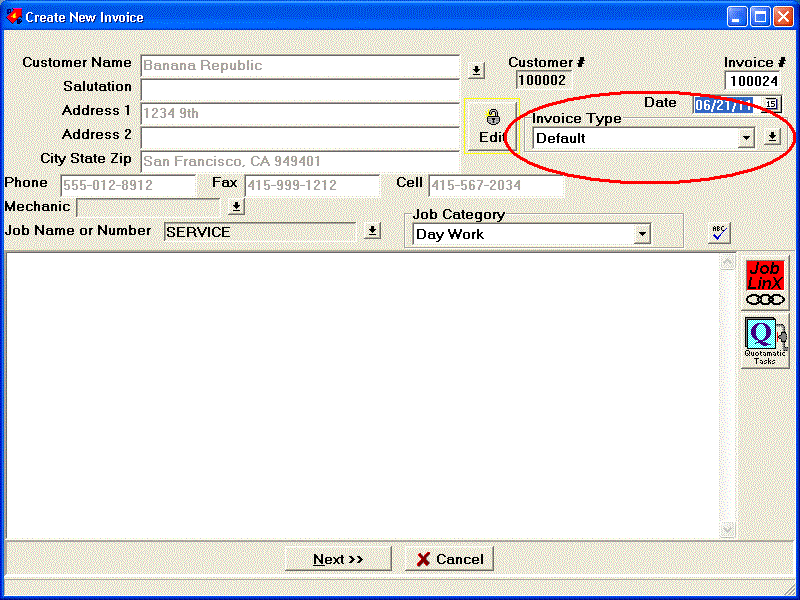
Create your invoice types by clicking the dropdown button at the right hand side. Then click New and enter the Invoice Type Name. Set Invoice category (Day Work, Contract or Extra) to associate with your invoice type.
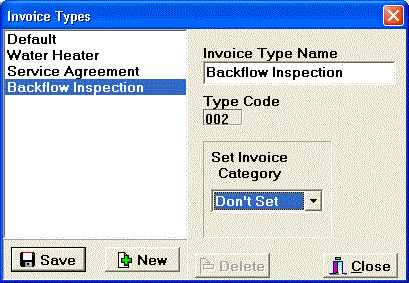
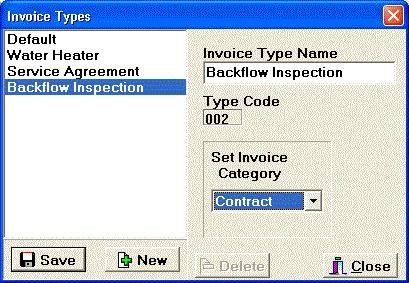
Remember to click Save.
Invoice Type Report: From the Main Menu click Print, Invoice Type Report.
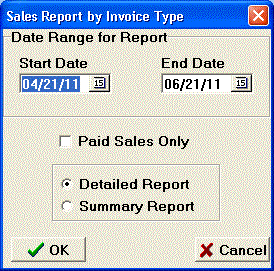
Set your Date range and click OK.
Price List Import: We're beginning a pilot project to import net list information from a large east coast supply house. If your wholesaler will send you an electronic price list, contact us if you are interested in integrating it into PricePoint.
Customer Info - Email tab now has an email button to send an email message to this customer using the default email address.
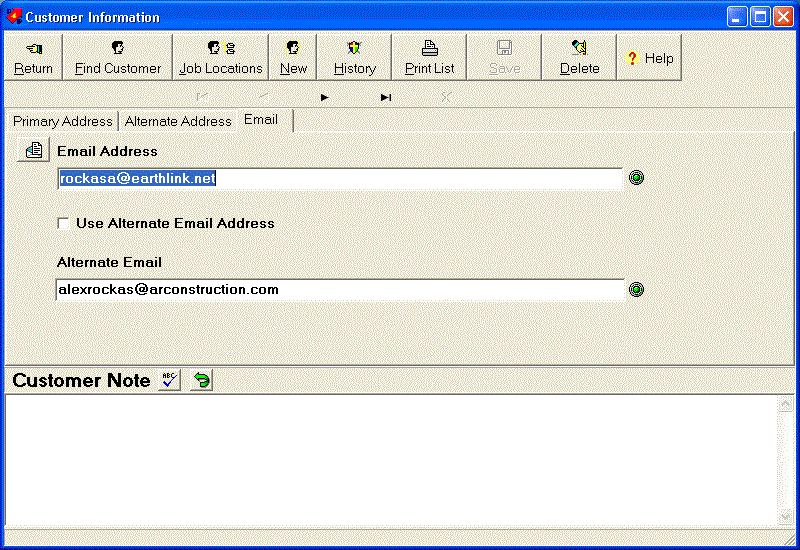
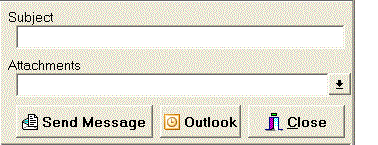 You can attach any
file you like to your message because the new version of the Email
Document dialog now includes a drop down button to attach the
document of your choosing.
Customer Balance - Selecting Show all with Show Details checked will now report on all payments made against closed invoices. This change will affect people who have been filling in the date paid field in invoices to close out invoices manually. If the invoice has been closed and the payments do not add up to the total of the invoice, PricePoint will report the difference as an adjustment with todays date on it. If you are one of the people closing invoices manually and you don't want to show the payments, just uncheck Show details.
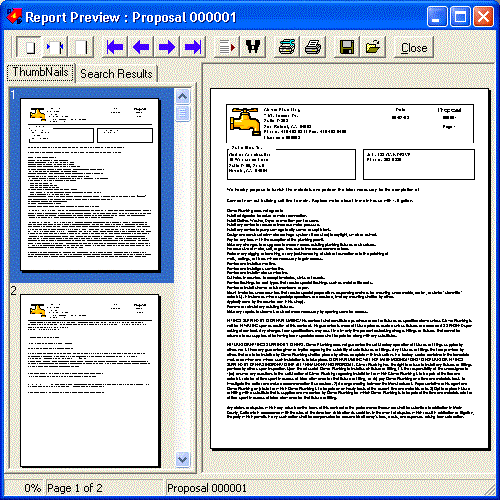
Proposal Builder - Lots of you have called or emailed me requesting to improve the printing functions in Proposal Builder.You'll be able to print out a single page of a proposal and the preview should agree with the print out.
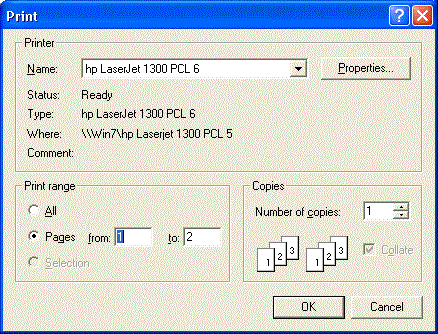
Print from Preview - Choose to print an entire document or just the current page as shown in preview by clicking on the Print button.
Customer Balance: Now includes an email button. Will
allow email of a Quick Statement to a customer. It's the only
way you can email a list of paid invoices to a customer if they
need that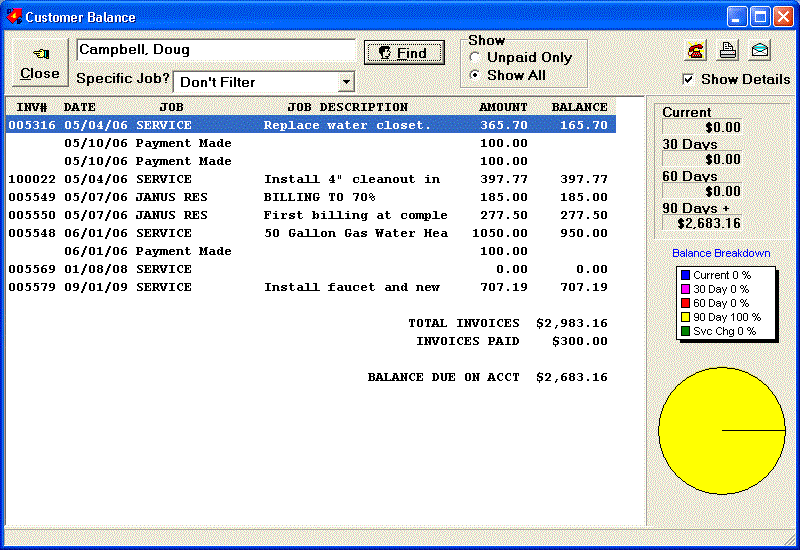 .
.
Customer Payments: Credit card numbers are now masked before
they are saved. Only the last 4 digits will be stored and shown
on the deposit transaction print out. If you are concerned about
past transactions, you can mask all CC transactions: From main
menu choose Utilities, Bonus Programs and choose Mask all Credit
Card Numbers and click OK.
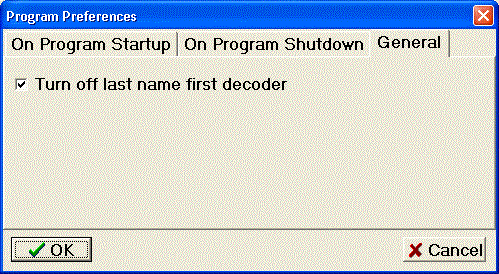
Last Name first decoder option: Now you can turn off the last name first decoder by going to Setup, Program Preferences, General and check Turn off last name first decoder. This required a slight change to the Program Preferences dialog so there's more space for preferences.
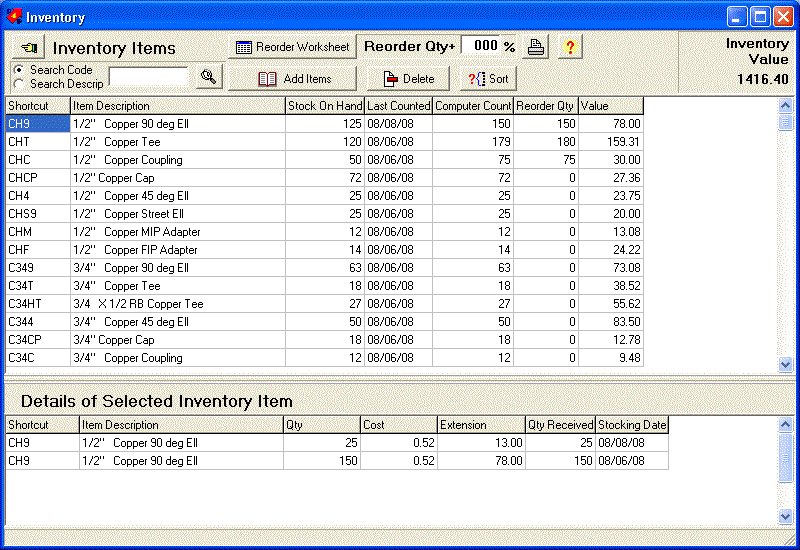
Inventory Search: Search your inventory grid either by
shortcut code or product description.
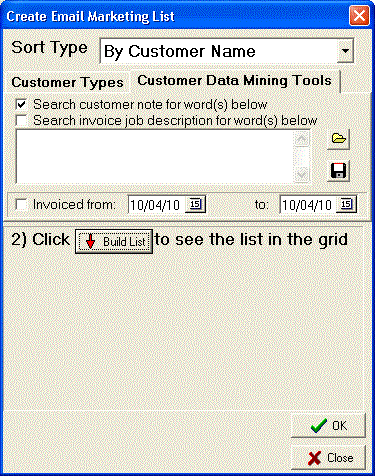 New Customer Data
Mining Tool: Ever want to send a thank you postcard (or an
email message) to all your recent customers? Now you can pick
names from the customer list by invoice date range to send a marketing
message. In other words, give me the names of all the customers
I have invoiced in the period X to Y and let me choose to send
print a label (postcard) or design an email message.
To use this new tool, click on the Customer Data Mining Tools tab. At the bottom of the tab you'll see an Invoiced from checkbox and two date fields so you can specify a date range. Check the box and fill in a start and end date and pricepoint will fill the list with customers who have been invoiced within the date range. Pretty neat, Huh?
Note: PricePoint will build the list using all of the
parameters that are checked off. So, If you just want a list of
current customers, uncheck all the other data mining tools
 Last name first
decoder: Tired of entering new customers Last name first and
then having to type the salutation name in by hand? Starting with
this version, start typing in a customer last name first and PricePoint
fills in the salutation automatically!
Note: you won't see anything happen until you type in the comma, then you'll see the decoder go to work. This function appears in new customer, customer info and after clicking the Edit button in invoicing or retrieve invoice.
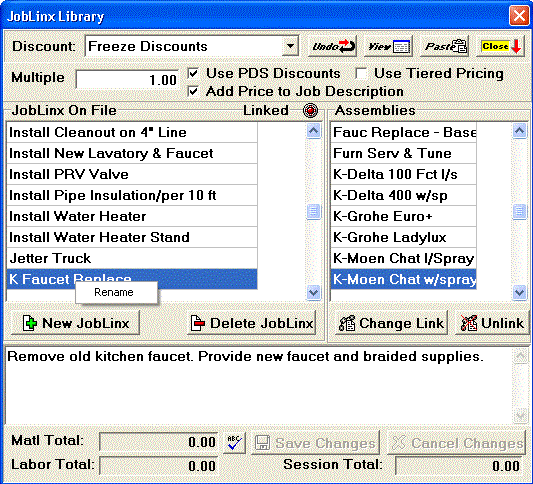 Renaming
a Joblinx: In the Joblinx dialog right click the Joblinx
name in the grid and choose rename. Change the name to suit yourself
and click OK. If the Joblinx name is used elsewhere, PricePoint
will alert you and cancel the change. After the change, PricePoint
will check for the old Joblinx name in your Quotamatic book and
change all of the instances over to it's new Joblinx name so everything
stays linked! I've also enabled the same functions in the Quotamatic
Book Links dialog. Just hover your mouse over the Joblinx
name and right click and choose Rename.
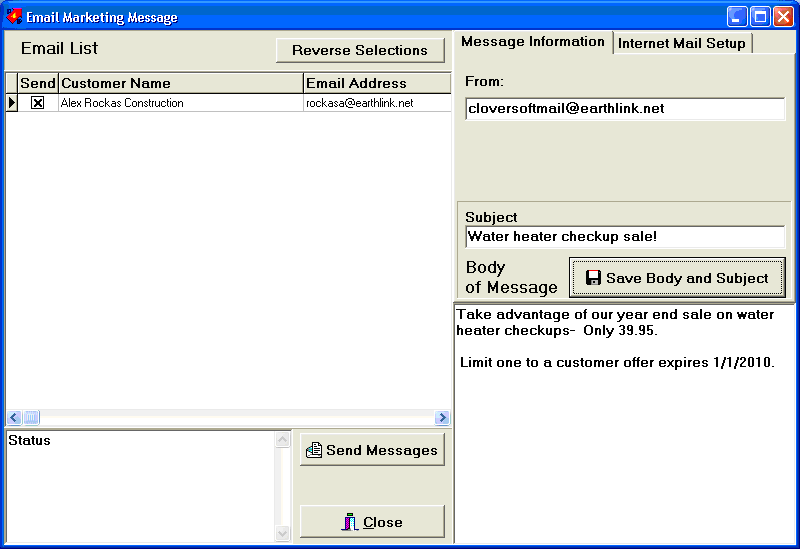
Send promotional email to your customers with the email marketing tool. It works just like the mail merge routine but instead of creating a mail merge file, it opens the Email Marketing Message dialog so you can create and send a promotional email. Type your promotional message into the body of message box and fill in the subject line. Save the message and subject by clicking Save Body and Subject. Internet mail setup is the same as that found in email functions for Invoice, statements, etc.
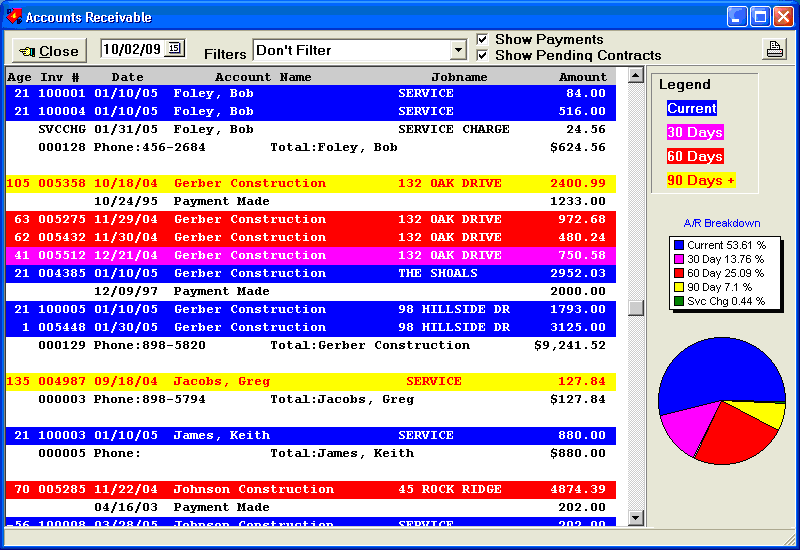
How many of you have called asking about the contract work pending entry at the end of the A/R report? Well, now you can choose to ignore it by unchecking Show Pending Contracts.
PricePoint now automatically opens the newest invoice in the list instead of the oldest. In other words, you no longer have to scroll through all the old invoices to get to the most recent. This is easier, right? I added this based on a request from a user whose been with us a long time and it just made sense when I thought about it.. Michelle, this one's for you. - Tim Clover
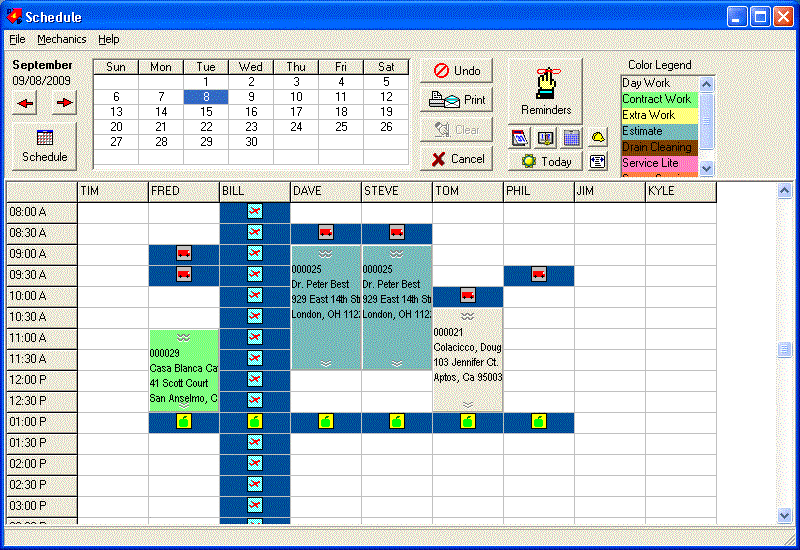
Colored panels in scheduling! Create work order types other than Daywork, Contract and Extra. When creating a new type, pick a color to display the work order panel in the scheduling app and pick an invoice type that the work order type will convert to when converting it from WO to Invoice.
You may define up to 1000 work order types. Each type may be
displayed in the color of your choice to make scheduling easier.
![]()
To create a new work order type, click the drop down arrow at
the far right of the panel.
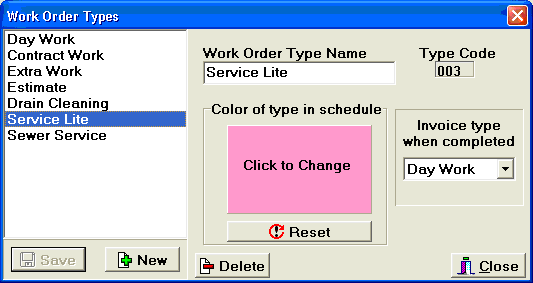
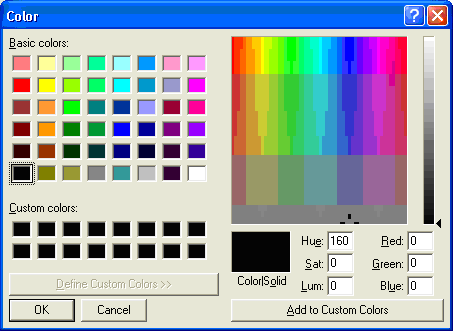
Create a name for the new type. Then click Click to Change
and choose a color, you can even make up your own colors if you
wish.
Set Invoice type when completed to the desired job category (Day
Work, Contract or Extra) to tell PricePoint what to do when the
work order type is converted to an invoice upon completion.
Checking & Payables: We've incorporated Add Line in the check details submenu and improved the logic of check detail entry. As before, if you know what the check amount should be and you want that to drive the total of the expense details, start with a check amount larger than the sum of the details. As you hit the enter key on each detail, a new line will be added with the remainder left to expense out on the new line. Otherwise, if you want the sum of the check details to drive the check amount, start entering check details with the amount set to zero and as you add each new detail line, the check amount will be the sum of the details.
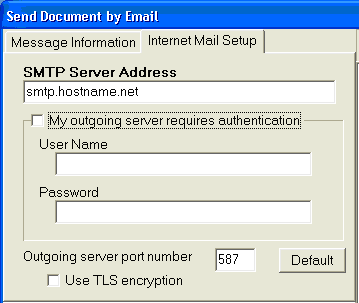
You can now set up PricePoint's built in email engine to work with your Gmail account by checking the Use TLS Encryption box in Email Setup.
On the Schedule window menu bar click Mechanics, Mechanic Info
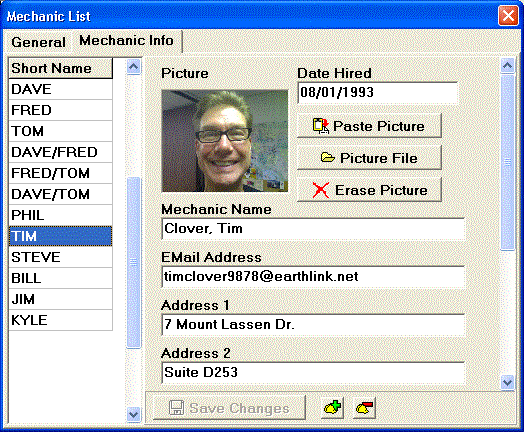
This is where you enter all the contact information about each mechanic in your mechanic list. Enter an Email address, a picture of each mechanic, emergency contact phone and contact person. If you can't see the slot for the information you need to enter, slide the scrollbar at the far right of the mechanic info tab. When you're ready, click Save Changes.
Click ![]() or
or ![]() to add or delete a mechanic. If adding a mechanic, the mechanic
name must be unique. Deleting a mechanic will remove all of their
information from the program. Note: if you delete a mechanic,
they will still show in the scheduling grid on days when they
are still on the schedule.
to add or delete a mechanic. If adding a mechanic, the mechanic
name must be unique. Deleting a mechanic will remove all of their
information from the program. Note: if you delete a mechanic,
they will still show in the scheduling grid on days when they
are still on the schedule.
Paste a mechanic's picture by copying the picture from your photo
software and then clicking Paste Picture.
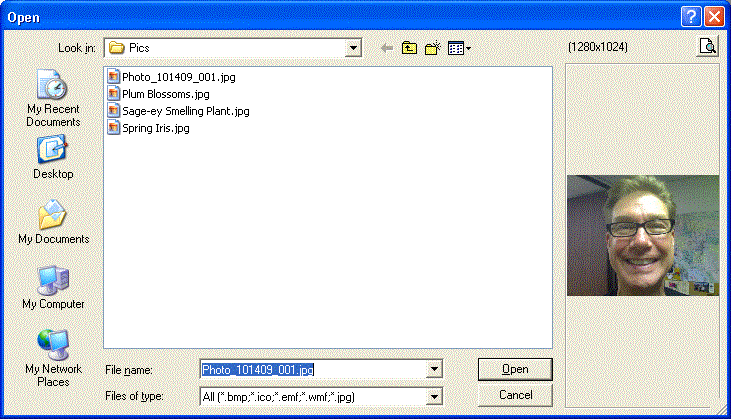
Save a photo in a mechanic file by clicking first on Picture
File then navigate to the location of your pictures by clicking
the Look in drop down. The dialog will preview each picture at
the right side. Select the desired picture and click the Open
button.
From the Schedule window click ![]()
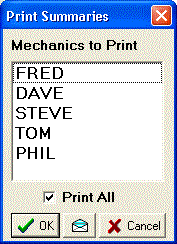 Select
the Mechanics you'd like to email or just check Print All to send
to all on your list. Click the Email button to start the built
in email application.
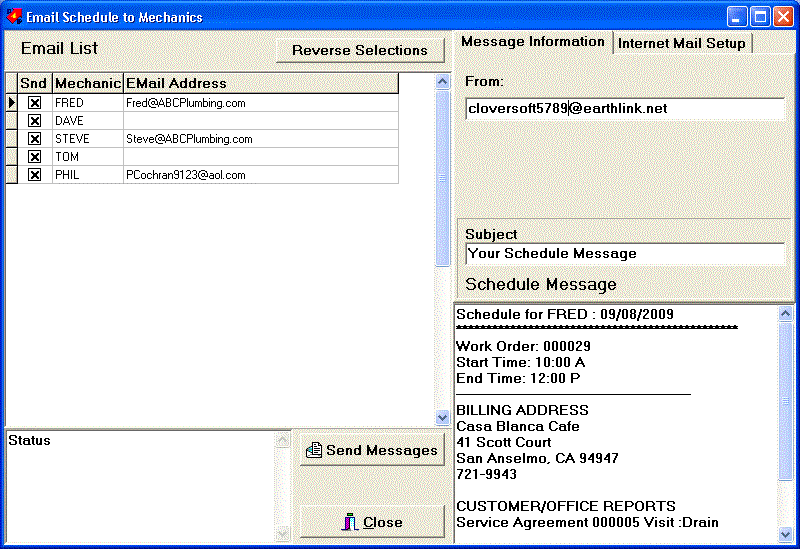
As you move through each mechanic in the email list at top left, you will see the message that will be sent to that mechanic in the bottom right message portion of the dialog. Each message is similar to the printed summary for each mechanic with the addition of the job description from the work order under the heading Customer/Office reports. If the email address is not filled in for the mechanic, fill one in now or the message cannot be sent. Check the box in the Send column of the Email list and click Send Messages
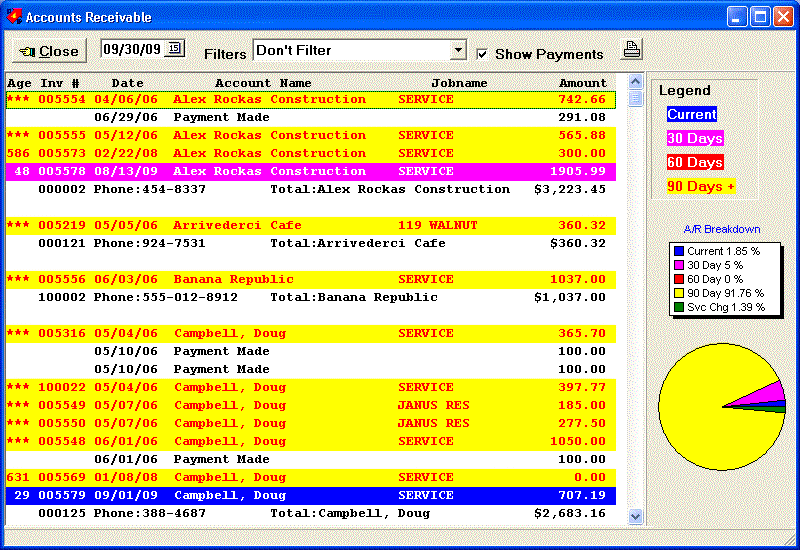
Every year, around tax time, I hear from users that they'd like to find out what their receivables were at some time in the past. Typically, this would be for the last day of the tax year. Well, now they can!
Pricing - New Option - Remember Assembly/List Reprice Options. Check this option and PricePoint will remember your favorite repricing options for the entire list or for assemblies when loaded. Previously PricePoint would always default to Reprice at saved settings.
Invoice, Estimate, Work Order, Proposal, Statement, Quotamatic Book Print outs - Picture types that can be used as logo have been expanded to include JPEG images (*.jpg).
More customer telephone numbers: Each customer record
now has 5 telephone numbers along with an extension located on
a new scrolling panel. Each number has a user defined label to
describe it. 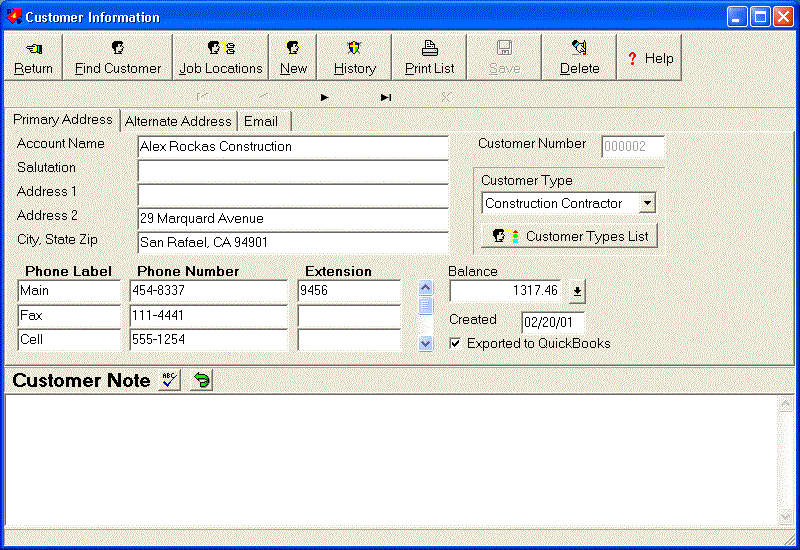
The default labels for the first 3 phone fields is Main, Fax and Cell.You're free to change the labels for any customer or save a customer's label arrangement as your defaults by clicking the Save phone labels as default. All new customers will have those labels attached to their phone fields.

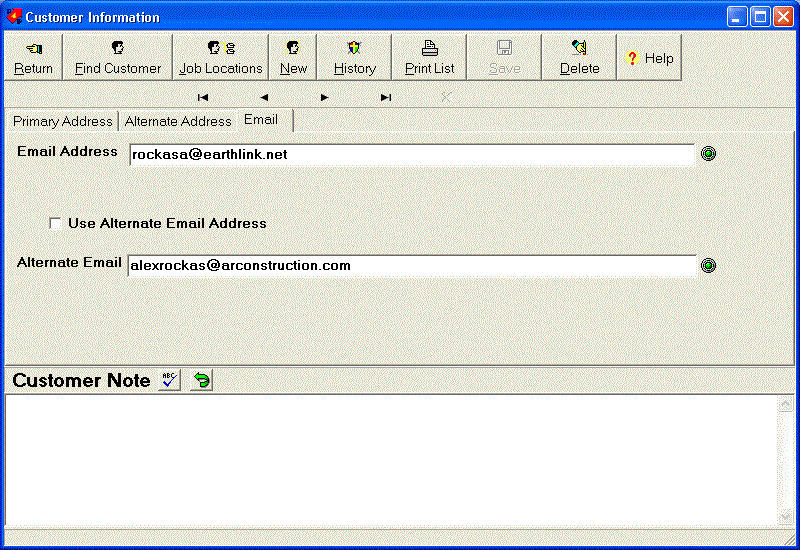
Customer info divided into sections: As you can see, because of the space needed to show these new fields, we separated customer information into separate sections using three tabs for Primary Address, Alternate Address and Email.
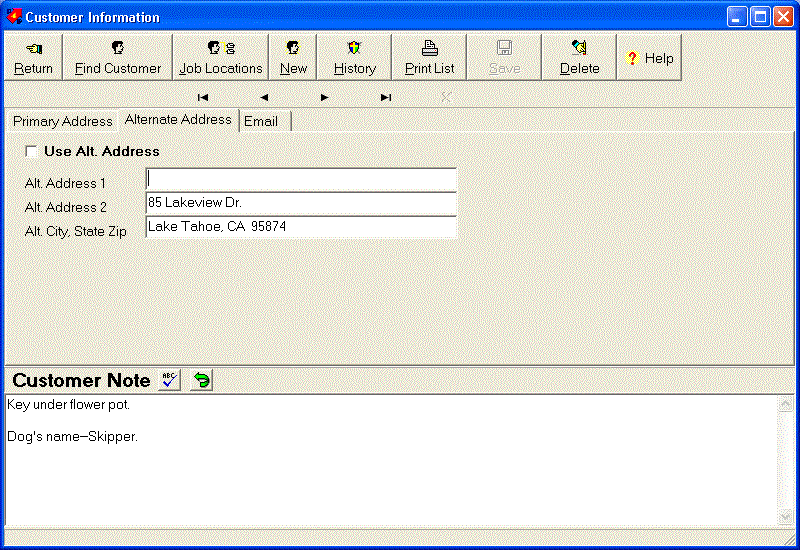
Two separate email address fields: Each customer will have 2 email addresses, Main and alternate. To help guard against typos in email addresses, we've added a little LED indicator at the end of each email address line. When the LED lights up green, the email address conforms to industry standards.
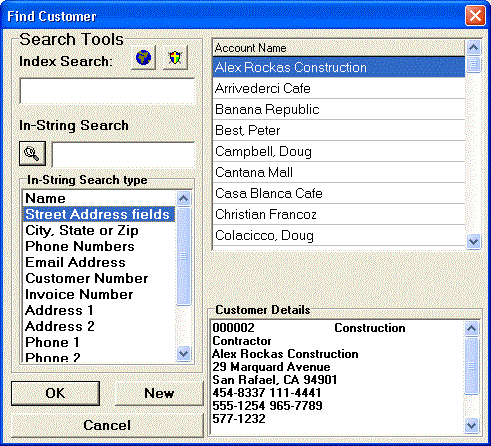 More ways to search
for customers: In addition to searches for all the new customer
fields, we've added multi field search capability to PricePoint.
For example, using Street Address fields will look for
the search text in both address 1 and address 2. Phone Numbers
will look in all the phone number fields. As you can also see,
we've changed the old fashioned radio buttons in the In-String
search box to a more modern scrolling list box. This allowed us
to include all the different types of searches without increasing
the size of the dialog.
We've been listening to you. - Tim Clover
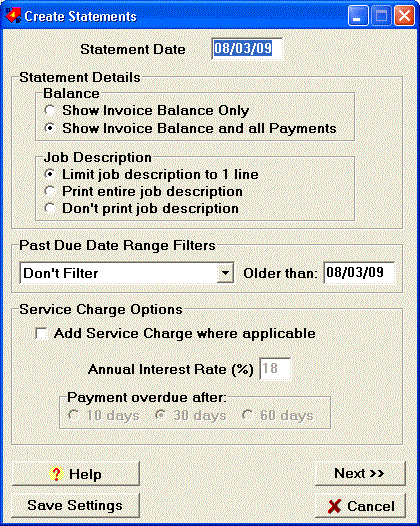
When statements are printed out, older versions of PricePoint would include a snippet of text from the job description of each open invoice. Since this didn't meet the needs of all of our users, we have introduced a change to the statement program that allows a little more user control over this feature. The statement option dialog box now allows the following user options:
You're probably already aware that PricePoint can display an
instant customer history when you click ![]() from the find customer dialog. Those of you with large numbers
of invoices also know that the customer history dialog can take
a while to appear. We've reengineered the process that produces
the customer history to speed up the process by a factor of 5.
from the find customer dialog. Those of you with large numbers
of invoices also know that the customer history dialog can take
a while to appear. We've reengineered the process that produces
the customer history to speed up the process by a factor of 5.
We got started on this project because one of our old customers asked us about a problem he was having with collections history. The most logical place to access the collections history is in Accounts Receivable and that was the root of the problem. Since A/R only displays open invoices, any collections history tied to closed invoices wouldn't show up. If promises to pay were made and linked to an invoice that applies to several invoices, once the linked invoice was closed, you couldn't see the history.
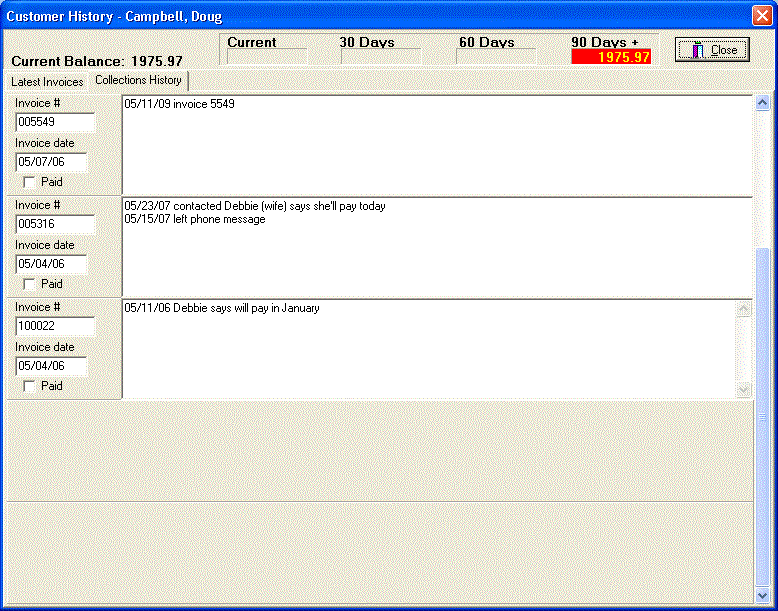
To solve this problem, we decided to make a change in the most logical place: customer history. This dialog is available before a work order is scheduled or an invoice is written. That way the collections history can alert you to a potential problem before the work is scheduled. If there is a collections history for this customer, the customer history dialog will display a new collections history tab. Collections history is sorted with most recent at the top, just like the invoices in the customer history display, with each record showing whether the linked invoice is still open or paid.
As your company grows, you'll find you need to start tracking inventory. Inventory is simply materials that are kept in stock for later use. Inventory is listed as an asset on the company balance sheet. Materials are ordered from various vendors using Purchase Orders and then, as the materials are received, placed in inventory. The quantity ordered and the cost of each item on a purchase order is agreed upon with the vendor. When the item is received at the warehouse the quantity times its cost creates the value of that item in inventory. As invoices are created, items in the bill of materials are subtracted from the quantity in inventory to arrive at a new computer count of the items left in the bin. Periodically, inventory must be maintained by physically counting the items in inventory and correcting the computer count.
The first step is to set up your "seed" inventory:
the items you normally keep in stock. From the Main Functions
Menu menu bar choose Activities, Inventory.
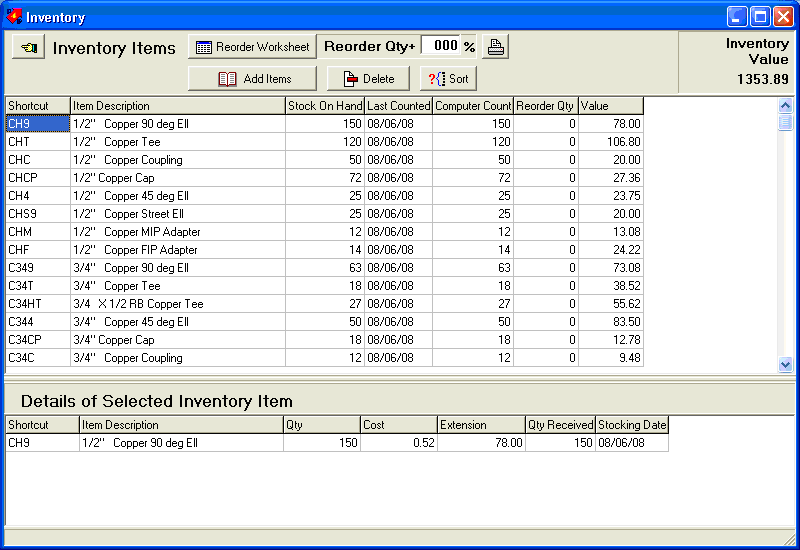
Click Add Items to show PricePoint's familiar pricing program.
Simply pick the items from the database and don't worry about
the selling prices. Adjust the prices in the Net column to agree
with what you paid (on average) for each item. If you don't know
what you paid, don't worry about it, just let PricePoint estimate
your cost as usual. When you are done with your list, click Next
and then click Finished to import the list into your "seed"
inventory. If you forgot something, simply click Add Items again
and find the new items to add. If you pick an item that's already
present in your inventory, PricePoint will add the new item to
the existing count in your inventory list.
Now that the Inventory shows your items, notice that as you move
though the items the details of each selected item shows in the
lower pane of the inventory window. At this point each item will
have only a single detail, however, as new items are added through
the purchase order process, more details will be added for each
item. Each detail for an inventory item has a date stamp on it
representing the date that it was stocked. This leads us to a
discussion of an important concept in inventory control: how PricePoint
arrives at the value of your inventory.
PricePoint takes the Computer Count of each item and compares it to the details on file. It first uses the value of the most recent items stocked, then those items less recent until it has arrived at the amount of items in the computer count from most recent to least recent. Cool, Huh? For example: if you have a bin with 100 fittings 50 of which were stocked today at a cost of 1.00, 25 fittings from last week at .75 and 25 fittings from 3 weeks ago at .50 then the value of the 100 fittings is (50*1.00) + (25*.75) + (25*50) = 81.25.
Rearrange the order of the items in your inventory by right
clicking on an item and using Cut and Paste. Your inventory list
also may be sorted by clicking Sort.
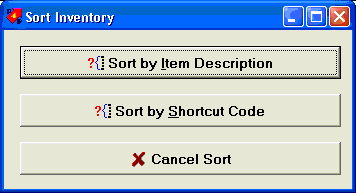
To delete an item and all of its' details from inventory, select
the item and click Delete.
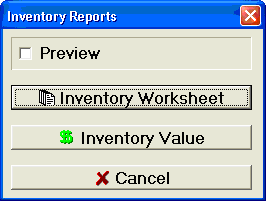
Print various inventory reports by clicking Print. The inventory
worksheet is designed as an aid when counting items in your warehouse.
The inventory value report may be of interest to your accountant.
Proper inventory control requires counting, lots of it. The computer count can be corrected so that it reflects the true quantity of items in inventory. Click on the Stock on Hand column and change it to the correct count and PricePoint will correct the computer count, change Last Counted to today's date and adjust the value of your inventory.
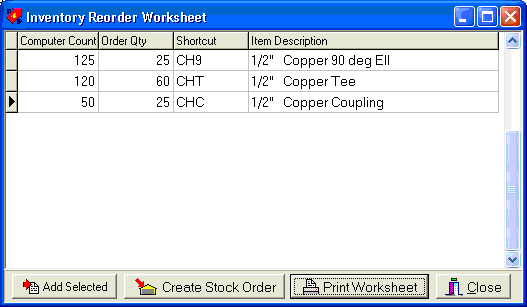
The reorder quantity is the minimum stocking level that you'd like to maintain on an inventory item. Setting a reorder quantity will allow you to create stock orders automatically when the computer count falls below that level.
This control allows you to set a percentage over your minimum stocking level. If this box remains at 0, then the quantity ordered will just bring inventory up to minimum levels. For example: click in the box and type 20 to set your restocking order to 20% above your reorder quantity.
Click Reorder Worksheet. The Inventory Reorder Worksheet will list all of the items that have fallen below the reorder quantity minimum level. There is a computer count and the order quantity so you can adjust your order as necessary. To print a worksheet of your restocking order so you can physically check it against the condition of your inventory, click Print Worksheet. If you need to reorder any additional items, simply select all those items in the inventory window and click Add Selected. Once you have your list like you want it, click Create Stock Order to begin a Purchase Order for these items.
Purchase Orders allow you to control the amount and price of items that you buy from vendors. These items may be placed into inventory or they may be special orders for customers.
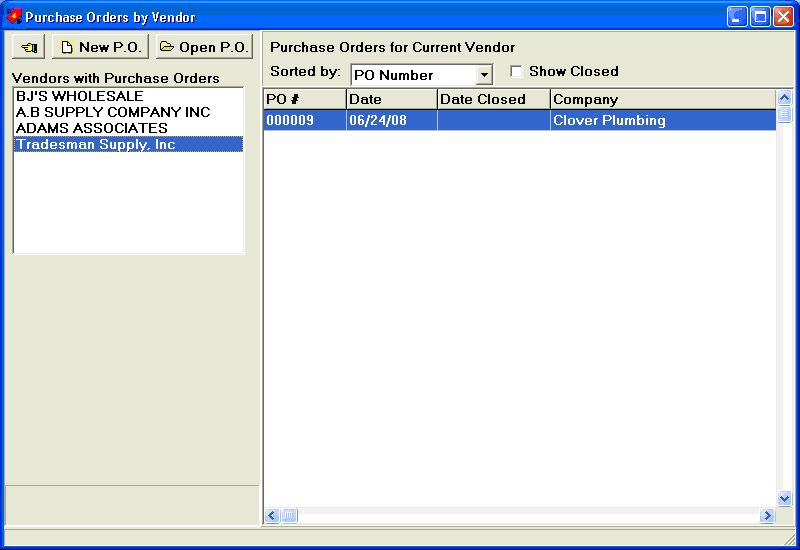
From the Main Functions Menu menu bar choose Activities, Purchase Orders. The Purchase Order by Vendor window shows all the purchase orders on file for each vendor. Click New P.O. and choose the vendor from the list in the Find Payables Account dialog, or enter a new vendor by clicking New Account and entering in the name, address and Email for the vendor. Click OK to choose the Vendor.
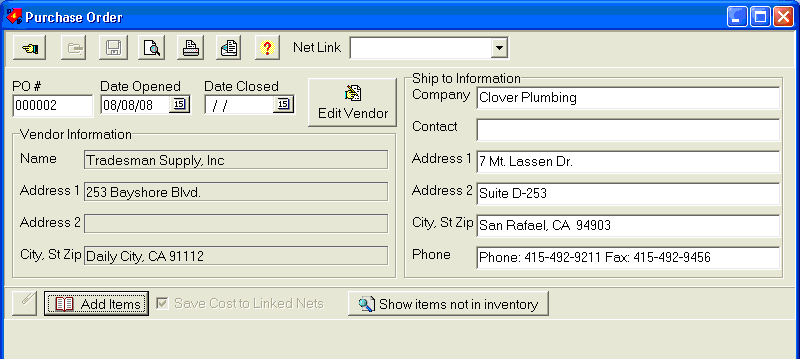
The Purchase Order window opens with a blank PO. The ship to information
is automatically filled out with your company's return address
as all PO's are stock orders. The PO number is filled out and
the date opened shows today's date. To add items to your PO click
Add Items and pick from the database of parts. Before we do that,
turn your attention to the Net Link combo box at the top of the
PO window.
You can associate the vendor on this PO with one of the vendors in your Net List in Pricing. That way when you fill in the cost of each item on your purchase order and save it, you are updating the net list for this vendor in one step. That way, your pricing is in sync with the replacement cost of each item on the PO. Click the Net Link combo box and choose a vendor from your net list. Confirm that this is the correct vendor by clicking OK.
Once the vendor is linked, clicking Add Items will open the Pricing window with the correct vendor name highlighted in the Supplier Net Setting box. Choose the items from the database and click Next and the Finished to add the items to your PO.
A PO is really an agreement with your vendor to supply the quantities of each item at a specific price. Fill in the Cost column with that and change the Quantity column if need be. Leave the Qty Received column blank until the vendor delivers the goods to you. Click Save to save your purchase order.
Cost figures that you have entered for the items are saved to the linked net list. Filled items are sent to inventory. (see: Receiving the Items in the Purchase Order below)
Click Print to print out the PO or Preview the print out by clicking Preview. You can email the PO to your vendor as well by clicking Email. The email address is part of the Payables Account information. To fill in an email address, click Edit Vendor and fill in the email address for the vendor.
When the goods on your PO are delivered to your company, fill in the Qty Received column. When the Qty Received equals the Qty column, PricePoint will fill in the Stocked On column with today's date. These filled items are ready to go into inventory. When you save the PO with items that are filled, PricePoint will update your inventory counts to reflect the added items. Once an item is filled and saved, the item is disabled and you can't make further changes to the item. Once all the items in the PO are filled and saved, the Purchase Order is closed with the date the last item was filled.
Click Show Items not in Inventory.
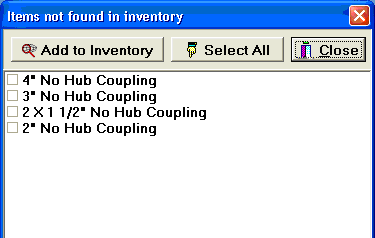
Select the box next to the items you need to track in inventory
and click Add to Inventory. The items will be added to inventory
with a count of zero. When these items are filled on the purchase
order, the counts will then reflect the items received.
The cost of postage just keeps going up and it seems that letters
take longer and longer to reach your customer. PricePoint includes
a nifty feature allowing you to email invoices, estimates and
proposals to your customers. Alternatively, you may use Microsoft
Office Outlook 2003 or 2007 to send your message. To start simply
click ![]() . PricePoint will
always look in the customer note field for an email address. If
more than one email is stored in the customer note, PricePoint
will use the first one it finds.
. PricePoint will
always look in the customer note field for an email address. If
more than one email is stored in the customer note, PricePoint
will use the first one it finds.
Now PricePoint creates a PDF of your document, a file
type that can be viewed by any computer with the free version
of Adobe Acrobat viewer installed. You’ll see a quick
progress window appear as PricePoint creates this file, then attaches
the PDF to the new message. The new message will be displayed
either by the built in Email dialog or Outlook. To use Outlook,
see below.
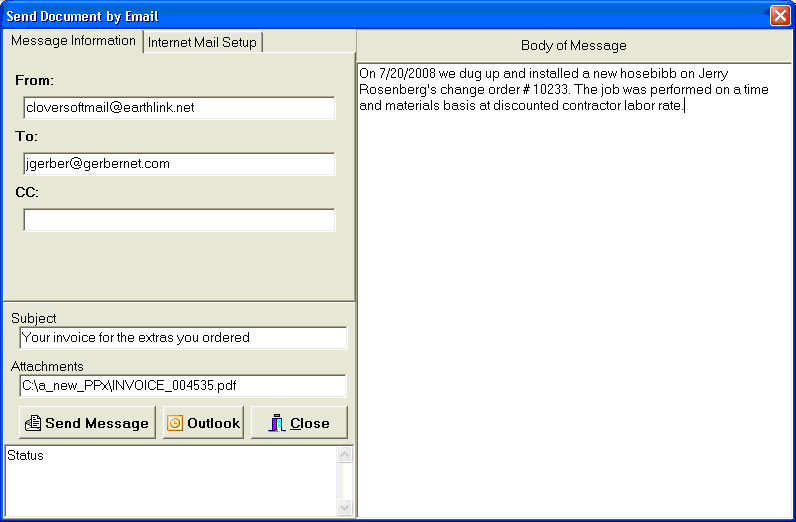
If you want to use Outlook instead of PricePoint’s built
in email sender, click  . This will open Outlook and create a new email message
with the PDF attached. Running Outlook this way will not change
the default email method in PricePoint, however. It will only
use Outlook when you click the button from the built in email
dialog. If you want to always use Outlook to send your email,
you’ll need to set that option in Setup, Computer Info
and click the Email Options tab.
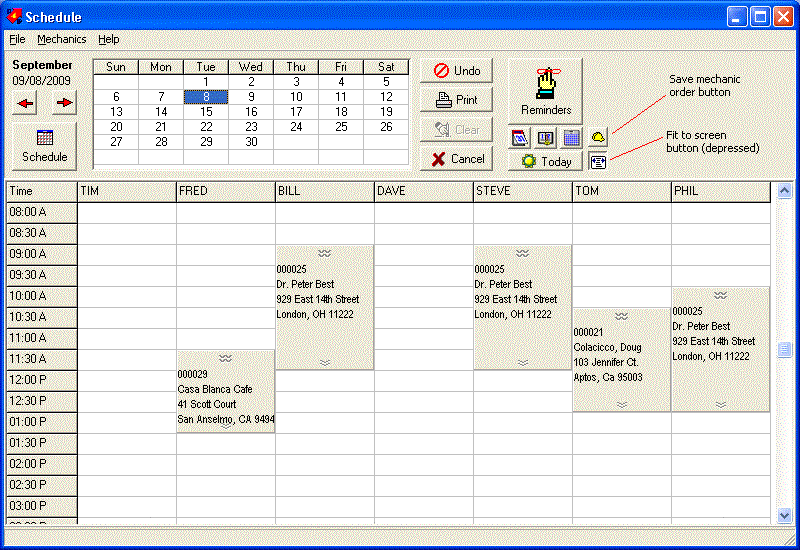
We've made some big improvements to our scheduling program that make it truly a world class scheduling tool! The new version features drag and drop scheduling with job data shown on movable schedule panels. Click on the move handle to move the schedule, click on the extend handle to change the job duration. Switch mechanics by moving schedule panels to other columns, or adjust schedule and change mechanics with the new change mechanics dropdown in change schedule dialog. Week View by mechanic, change date or time within the week by dragging schedule panel. Month View with schedule preview - displays a schedule icon if any jobs are scheduled for the day. The icon color changes to show a light schedule vs a heavy schedule for the day. Click on the day in month view to display the day schedule. Cut, Copy schedule panel from one day and Paste onto another day or from one mechanic to another! - Tim
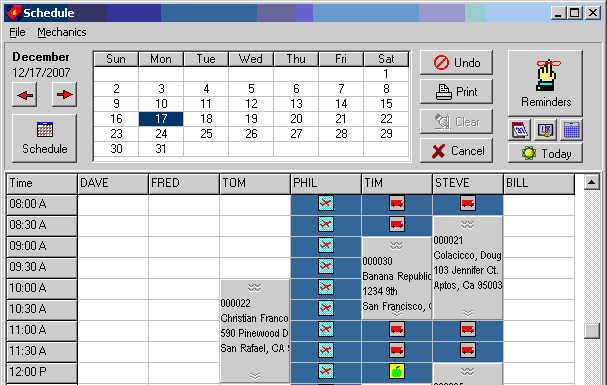
PricePoint has a full featured scheduling and dispatch program
that is available at the touch of a button! Work orders are represented
by movable schedule panels.
To move job to another mechanic or a different time on the same day:
Grab the schedule panel's Move handle by clicking and holding down the mouse button. Then drag to another mechanic or time of day. To change the duration of the job, Grab the schedule panel's Extend handle with the mouse pointer and extend or shorten the panel.
To move job to another mechanic or time on a day that is not displayed:
Right click the schedule block that needs changing
Choose Cut from the popup
Navigate to the date (day view) or week (week view) as required
Left click the appropriate starting time and choose Paste
..OR
Choose Adjust Schedule from the popup
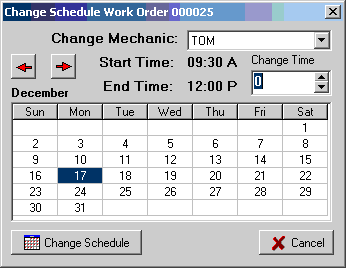
To change the Time of day:
Click the Change Time up or down arrows to adjust the starting time.
To change the date of the work scheduled:
Click the new date on the Change Schedule calendar.
To change the mechanic:
Select a different name in the Change Mechanic drop down.
Click Change Schedule button.
The Schedule grid should now display the changes.
Note: If the Change Schedule button becomes disabled (greyed out), there is a schedule conflict with another work order for this time and date.You'll need to reserve time for travel or vacation in your schedule. Or you may wish to fine tune a schedule once you are more familiar with the job requirements.
Start the Schedule program.
Select cells to block out in the schedule grid.
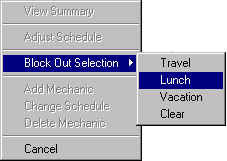
Choose Block Out Selection
Choose Travel, Lunch, Vacation or Clear from the popup.
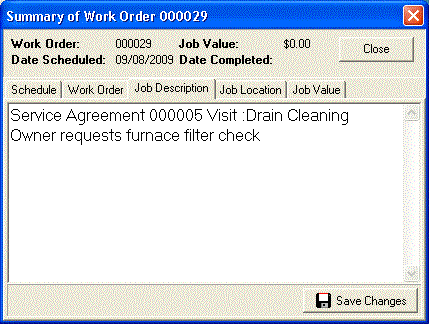
The summary of a work order displays all of the essential details
such as the name, address, value and all the scheduled dates and
times.
Start the Schedule program.
Double click on the scheduled block (avoid the Move and Extend
buttons, please)
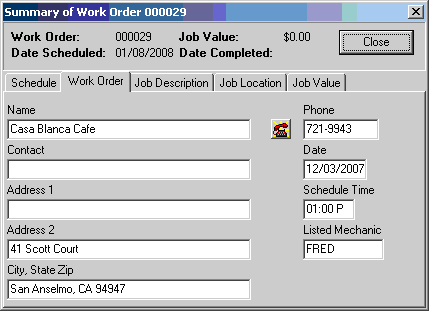
Use your modem to dial any of the contact numbers on a summary
page by clicking the adjacent dialer button.
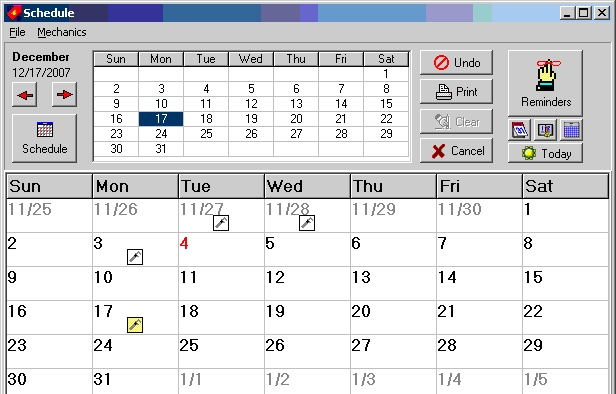
Click ![]() the Month
view button. The month view displays the state of the company
schedule for each day. The wrench is white if there are 2 of fewer
jobs scheduled, Yellow for 4 - 6 jobs and Yellow with a red wrench
for more than 6. This is a handy way of seeing how crowded the
schedule is for any particular day. Click any day in the month
view to display the day view.
the Month
view button. The month view displays the state of the company
schedule for each day. The wrench is white if there are 2 of fewer
jobs scheduled, Yellow for 4 - 6 jobs and Yellow with a red wrench
for more than 6. This is a handy way of seeing how crowded the
schedule is for any particular day. Click any day in the month
view to display the day view.
Click ![]() the Week
view button. The scheduler will display the week view for the
first mechanic in your list.
the Week
view button. The scheduler will display the week view for the
first mechanic in your list.
 Or, if the day view
is active, click the heading showing the mechanic's name to display
that mechanic's week schedule
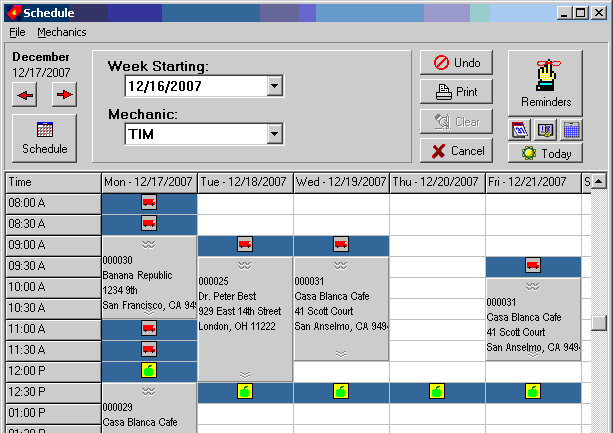
Drag a schedule to another day during the week for this mechanic
or right click the schedule panel and select Adjust schedule to
move to another day or mechanic. View a week view for a different
mechanic by selecting another name from the mechanic drop down,
or select a different week by selecting it from the drop down.
Click ![]() Day View.
Day View.
PricePoint was way ahead of its' time when we introduced the Quotamatic Book back in 1994. It was the very first tool available that allowed the average Joe (or Josephine) to create a custom flat rate book linked to PricePoint assemblies. We've made a number of improvements to it since then, the most important of which was a rewrite from the ground up for version 4.00. Well, we've done it again. Working closely with one of our users who has created a Quotamatic Book with over 200 pages, we have added improvements to accomodate that way he and his technicians use his book. It's the way most new improvements come about in PricePoint, we interview the users that are most adept at a particular portion of the program, then we build a better mousetrap based on their suggestions. It's a pretty good bet that all of us will benefit from the experience of a person who has mastered a particular feature, in this case, the art of building flat rates.
Table of contents: An alphabetically sorted listing
of all the page topics in your Quotamatic Book. Seems pretty obvious,
but when I originally designed the Quotamatic Book, I assumed
it would be a booklet. Well, Larry's book has over 200 pages of
tasks, so, his technicians need a tool to find their tasks when
they're in the field. Now they've got one!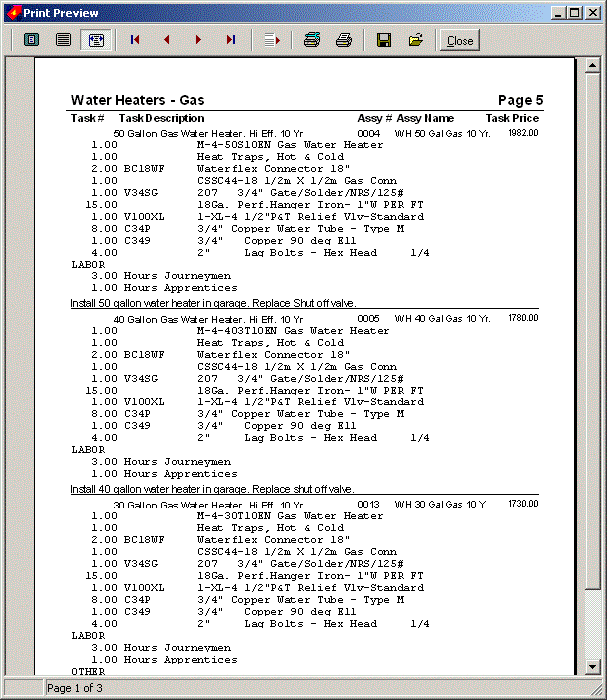
Task contents printout: When selling a task to a customer, technicians needed a better way to illustrate the scope of the job and all the parts required to do it. Of course, one wouldn't want to reveal too much detail in order to avoid price objections. Isn't that the point of flat rating? The answer is the task contents printout: a list of all the details of each task. The report shows the task code, task description, name of the linked assembly and the selling price of the task. Then it lists the details of the materials list, the labor details including hours and labor rate name, and the details of other charges - all without prices, of course. All the assembly details are followed by the linked joblinx text for the task. It's really a complete package that describes the task in detail: helping the technician sell the task to the customer and prepare to perform the job.
Print preview for accessory printouts: click ![]() and preview either the table of contents or the task contents
of the current page.
and preview either the table of contents or the task contents
of the current page.
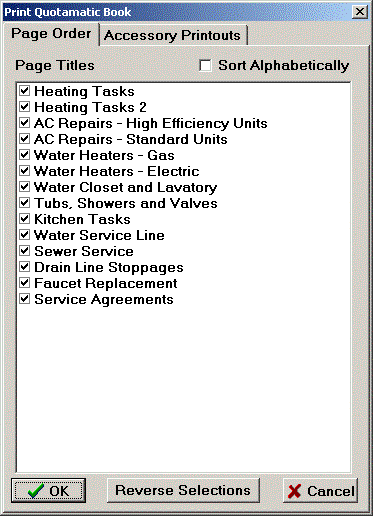
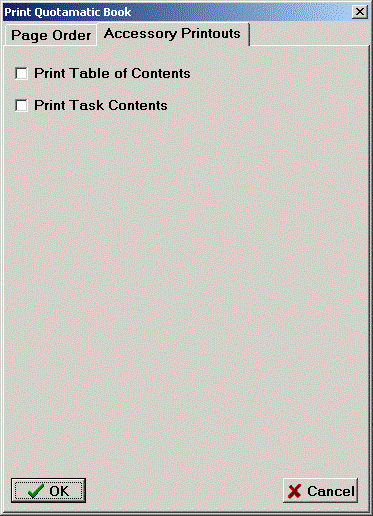 Printing
the Booklet: In order to add the two new printouts to the
booklet printing process, we added an Accessory Printouts tab
to the Print window so you can check the boxes to print out the
table of contents and task contents.
Unique task code: PricePoint will now look up each task
code as you type it in the Quotamatic book, and make sure the
code is unique. Only unique task codes are allowed. We've improved
the Quotamatic book interface (as seen in invoicing and estimating)
to allow for searching by task code. It's like entering a shortcut
code in pricing, no menus to navigate and really fast!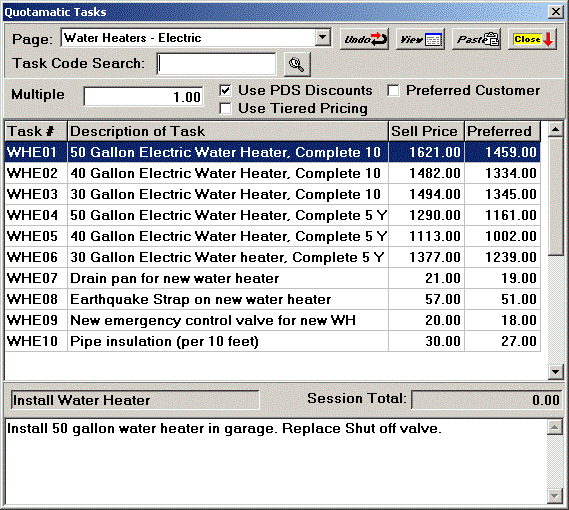
Quotamatic Tasks dialog: To find a task code in the
Quotamatic Tasks dialog simply click in the task code search box,
type the code, and either click ![]() or hit the enter key. PricePoint will find the page where your
task appears and will select the task in the grid so it's ready
to paste!
or hit the enter key. PricePoint will find the page where your
task appears and will select the task in the grid so it's ready
to paste!
More info when editing assemblies linked to tasks: When
you click the open button on an assembly linked to a task, PricePoint
opens Pricing so you can make changes to the linked assembly.
Now you'll see the name of the linked assembly and the description
of the task that it is linked to on the top border of the pricing
window.![]()
A service agreement is a contract sold to a customer promising a number of visits to perform a service check-up for a nominal fee. It also provides for a discount on materials/labor on all work performed during the term of the agreement.
Industry experts suggest that service agreements can expand a service business by improving repeat business. The discount offered to the customer decreases the likelihood of price shopping while each visit serves as a sales opportunity to earn the customer's trust. The customer may even request a "while you're here" extra. Service agreements also provide a way of helping to fill up the schedule during a slow period.
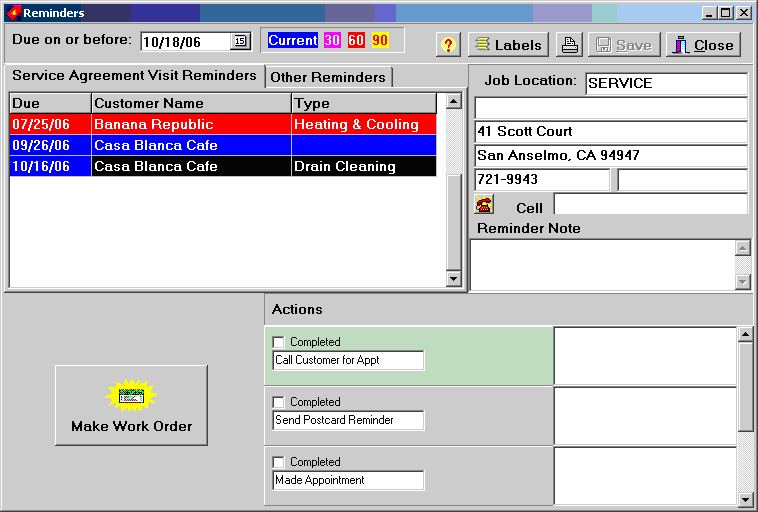
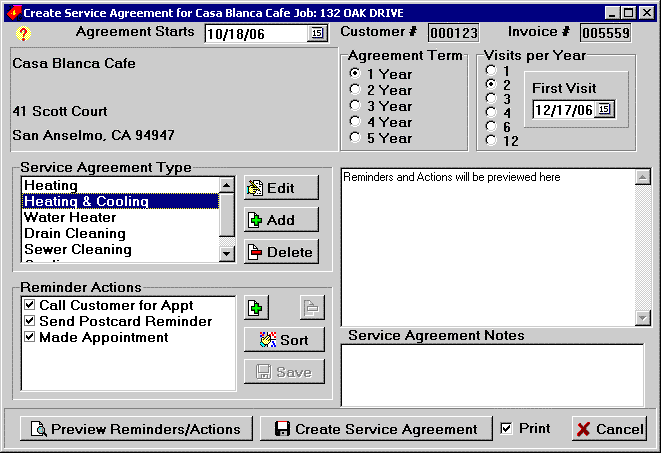 When a service agreement
is sold, PricePoint reminds users to contact the customer with
Visit Reminders.
At left is the dialog responsible for creating a new service
agreement. Simply set the agreement type, the term, visits per
year, and the types of actions to include for each visit reminder.
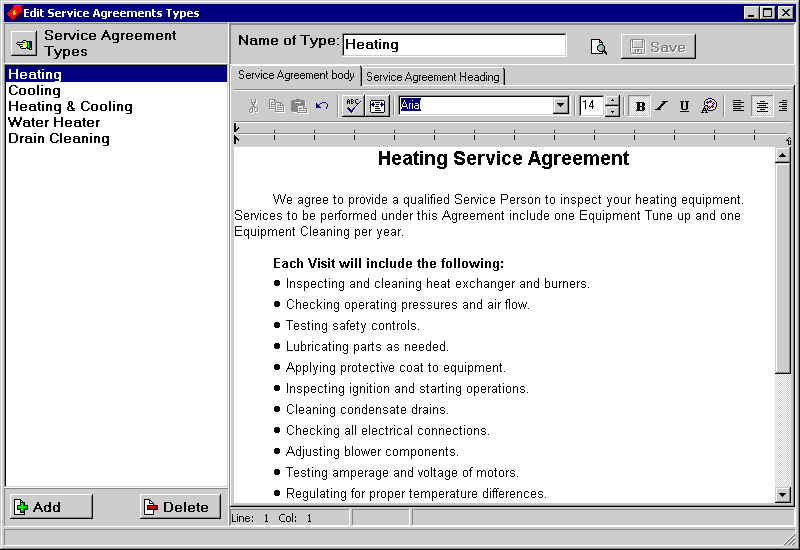
Each service agreement has a type. Each type is linked to the text of the service agreement document that can be printed out when the agreement is created. Below is the dialog for creating the service agreement type which features a full featured text editor.
Each visit reminder contains a number of actions that need to be performed by office staff. For example: office staff will need to contact the customer in order to make an appointment for the visit, or send a reminder postcard to customers. The software provides for direct dialing of customer contact phone, printing address labels and scheduling work orders for due reminders.
We're proud to announce the addition of Real Prices - national average purchase price for most of the items in our PDS database. Real Prices have been compiled from prices used by major hardware store chains and large wholesale plumbing suppliers. These cost prices will allow folks to use the built in pricing program to create estimates and invoices immediately without the need to first set up discounts from manufacturer's list pricing! This is quite literally the first time this has been possible! We can now offer a reliable stream of automatic net prices so people can spend more time getting out invoices and estimates and less time setting up and maintaining discounts.